TE Core Side Menu explained

Side Menu
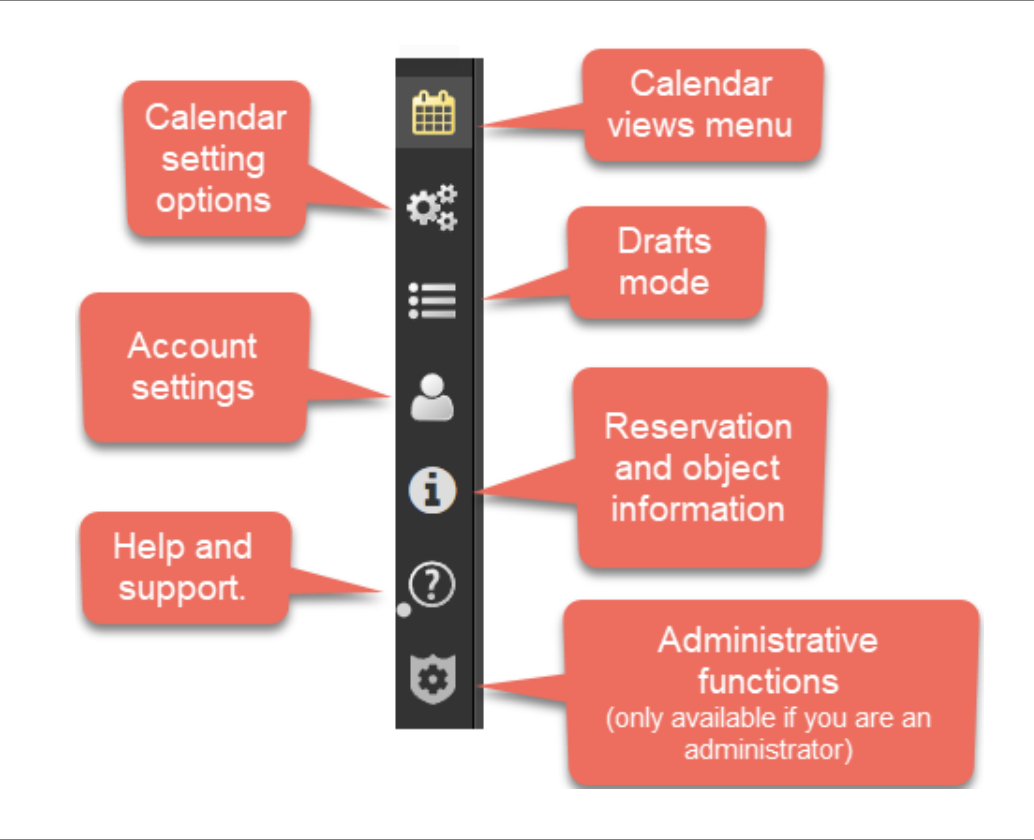
Tap an icon in the left hand side menu to open the information panel. The icons in the side menu options are identified in the figure below.
Views Panel
Views Panel
The views panel allows you to select a view that helps you schedule reservations efficiently.
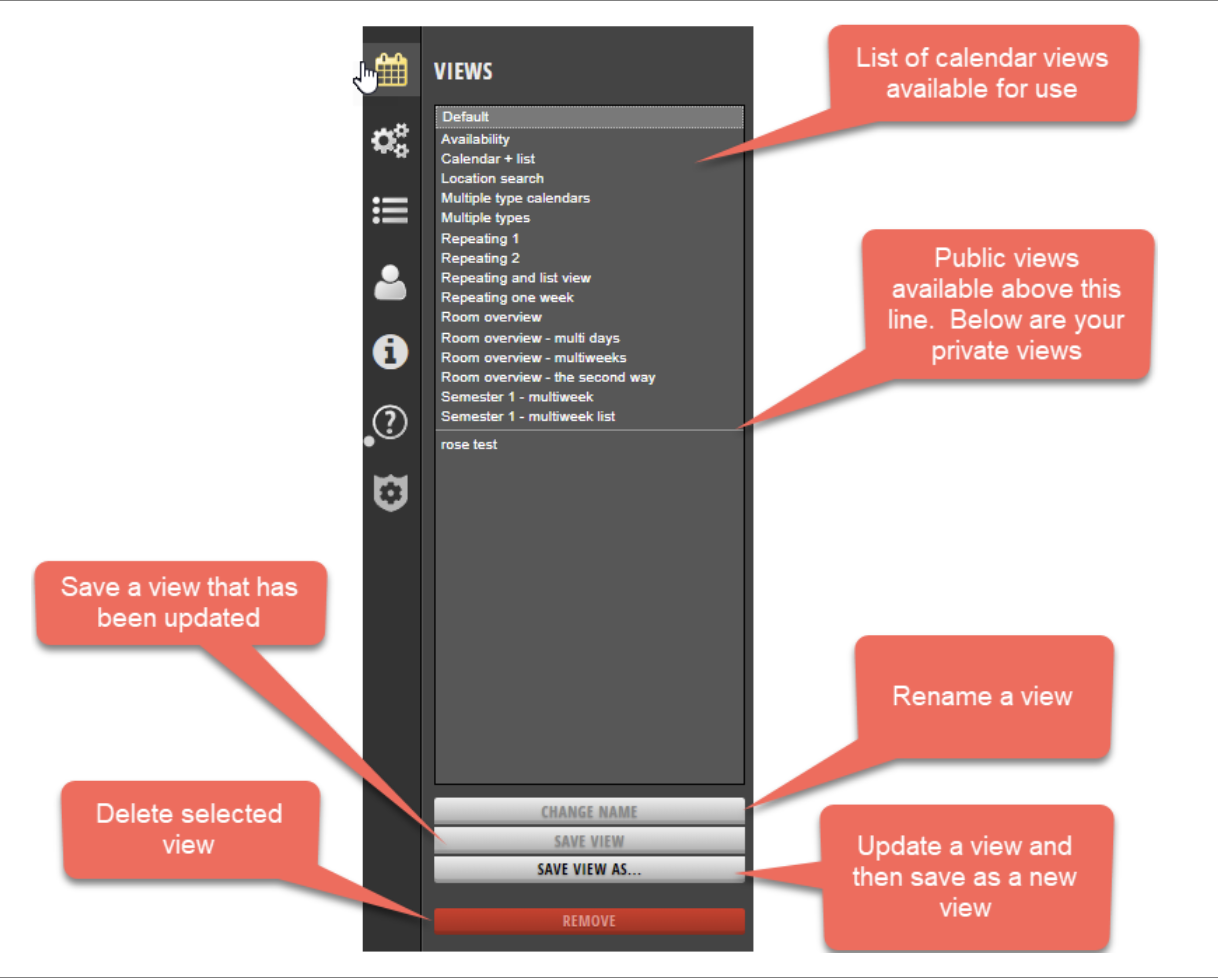
Views that are public, above the line, are available for all users of TE Core. The views below the line are available for personal use only. Select the view that suits your needs for scheduling or viewing reservations.
Settings Panel
The settings panel allows you to adjust the settings for each calendar section in the view.
Note that these settings are saved with the view when a view is created or updated. They can be altered by the user within each session using that view. When the view is opened again the settings revert to the saved ones.
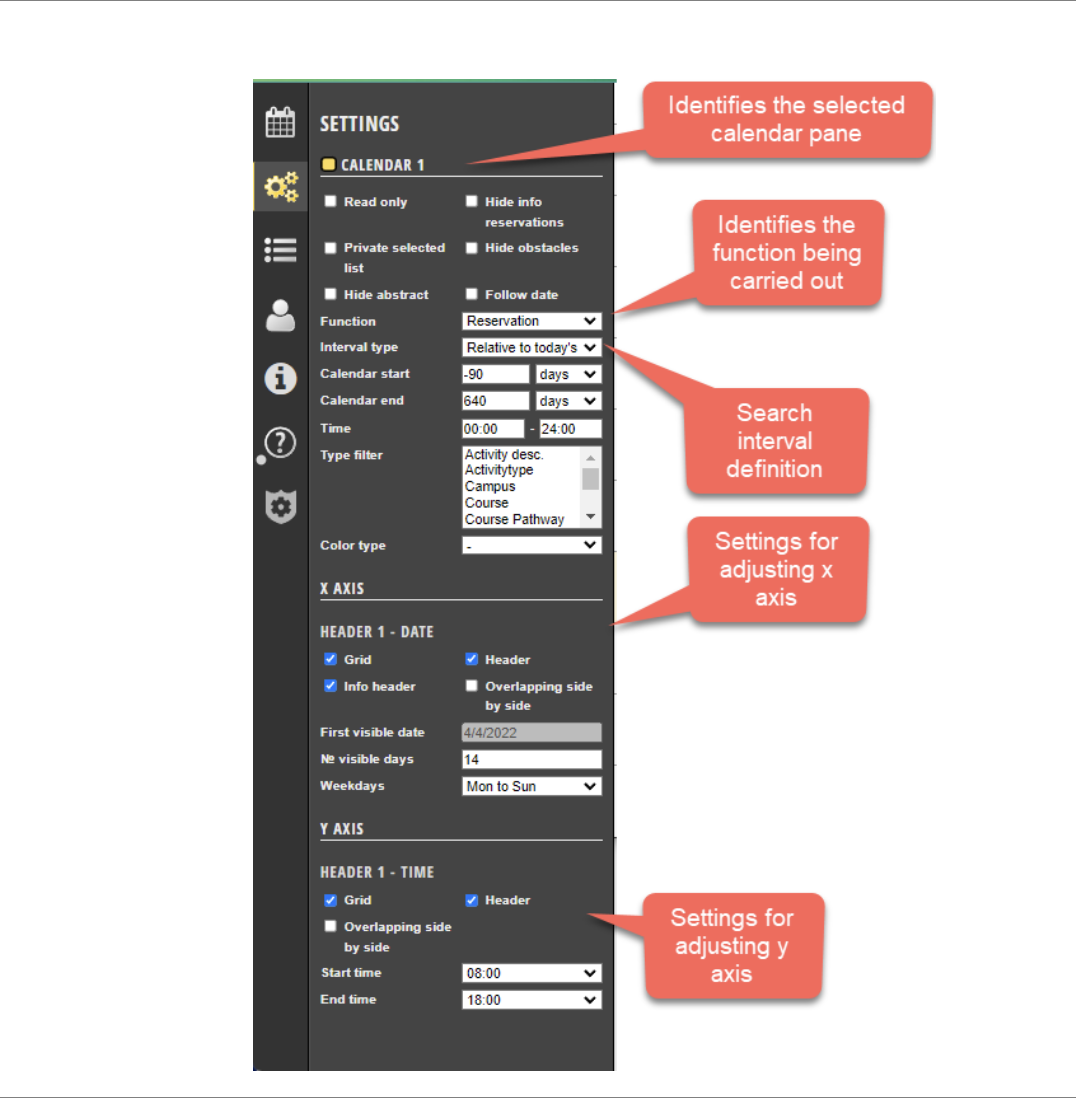
The top calendar section is where you make changes to the whole calendar.
Function selection allows you to select between different booking functions:
- Reservation represents a standard reservation booking (default)
- Availability allows you to set available times on a resource
- Info reservation allows you to schedule an information only booking.
Interval type allows you to select from a variety of ways to set the search interval for this calendar view.
- Relative to today’s date allows you to set a moving range based on today’s date by setting the interval as the number of days before and after today’s date.
- Absolute period sets a fixed interval by setting a fixed start and end date.
Daily time interval, define whether we are looking for reservations scheduled between 00:00 – 24:00 (default) or a defined portion of the day.
The x- and y- axis sections allow you to limit what is displayed within the search criteria by selecting:
- The number of visible days – 14 is default.
- The weekday pattern: Monday to Sunday; Monday to Saturday; or Monday to Friday.
- Check the overlapping side by side to see the reservations in parallel rather than overlaid.
Draft mode
Draft mode allows you to copy some reservations into a ‘sand pit’ to make changes and test ‘what-if’ scenarios. These can then be saved back into the dataset if desired.
Account settings
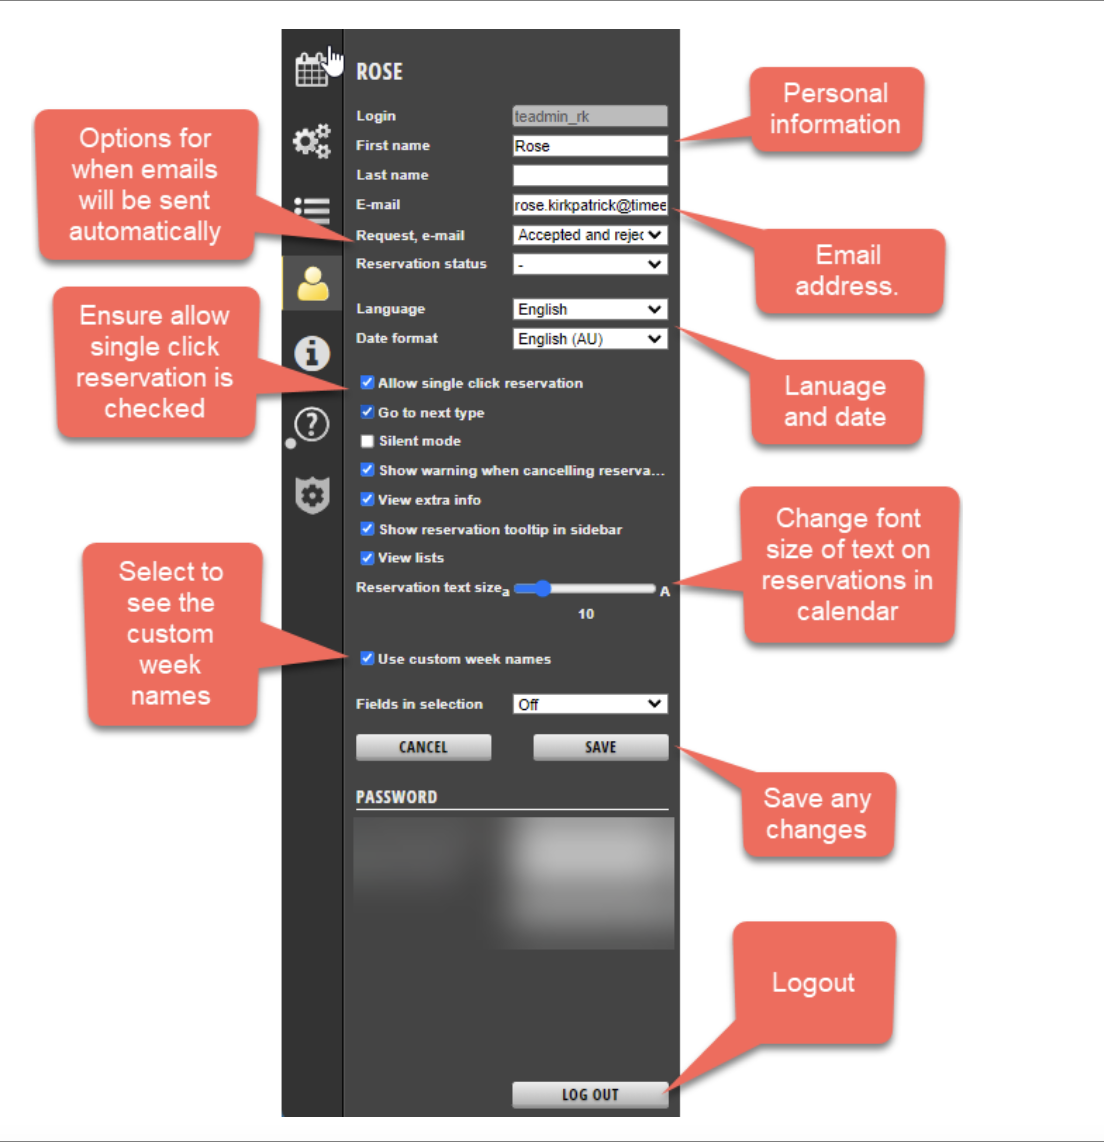
Personal account settings enable you to define your preferences. You can:
- Set your personal information
- Define the email address to receive emails from TimeEdit
- Subscribe to automatic emails
- If requested room is accepted or rejected
- If requested room is rejected
- No emails
- Language and date format
- Select the checkbox for allowing single click reservations
- Change the size of the font used on reservations in the calendar view
- Select to use the custom week names
- Log out button.
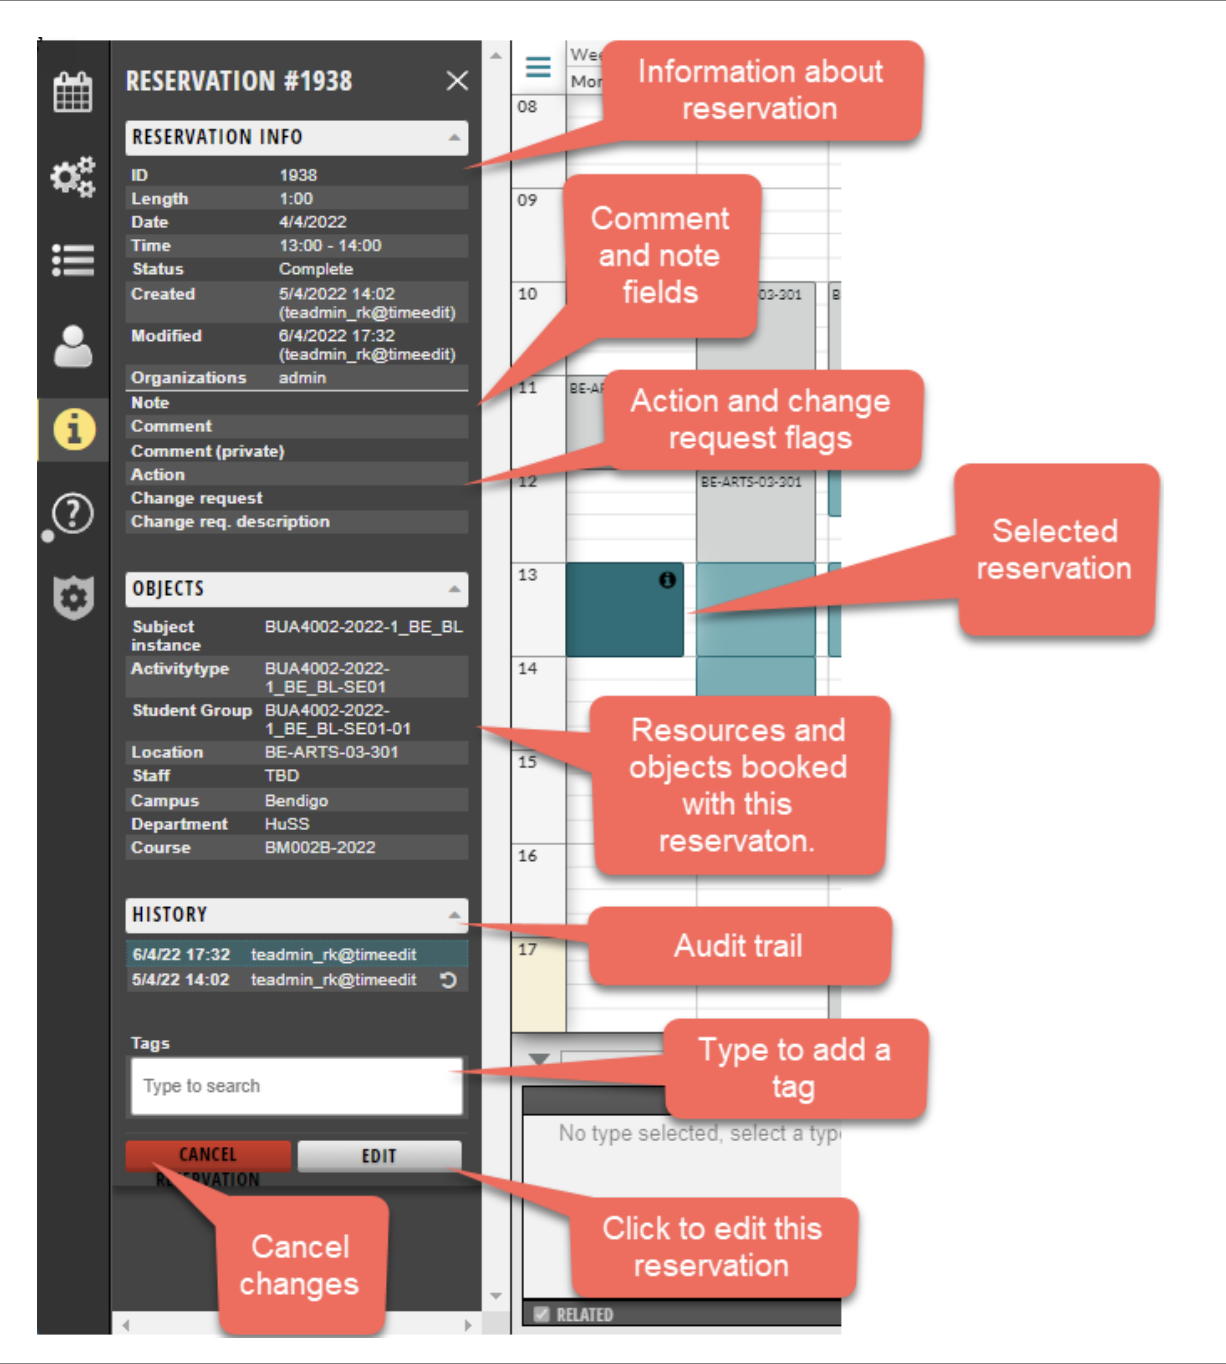
Information panel
The information panel displays information about reservations and enables editing of the reservation.
- Information regarding the reservation including date, time and duration as well as who booked and when last modified
- Note and comment fields where you can add additional information for this reservation.
- Note is like an additional reservation title
- Comment can be shown on the timetable and is a public comment field.
- Internal comment is for schedulers only, not visible in TE Viewer
- Action and change request flags. These are used to identify changes from source system as well as requested changes to the timetable.
- Objects section displays all the resources/objects that are booked or associated with this reservation.
- The history section shows the audit trail of any changes made to this reservation
- Tags box enables the addition of a tag to this reservation
- Use the edit button to modify the reservation. This will open up an additional window allowing you to update the note, comment and action fields.
- Use the cancel button to cancel any changes you have made to the comments and action fields.
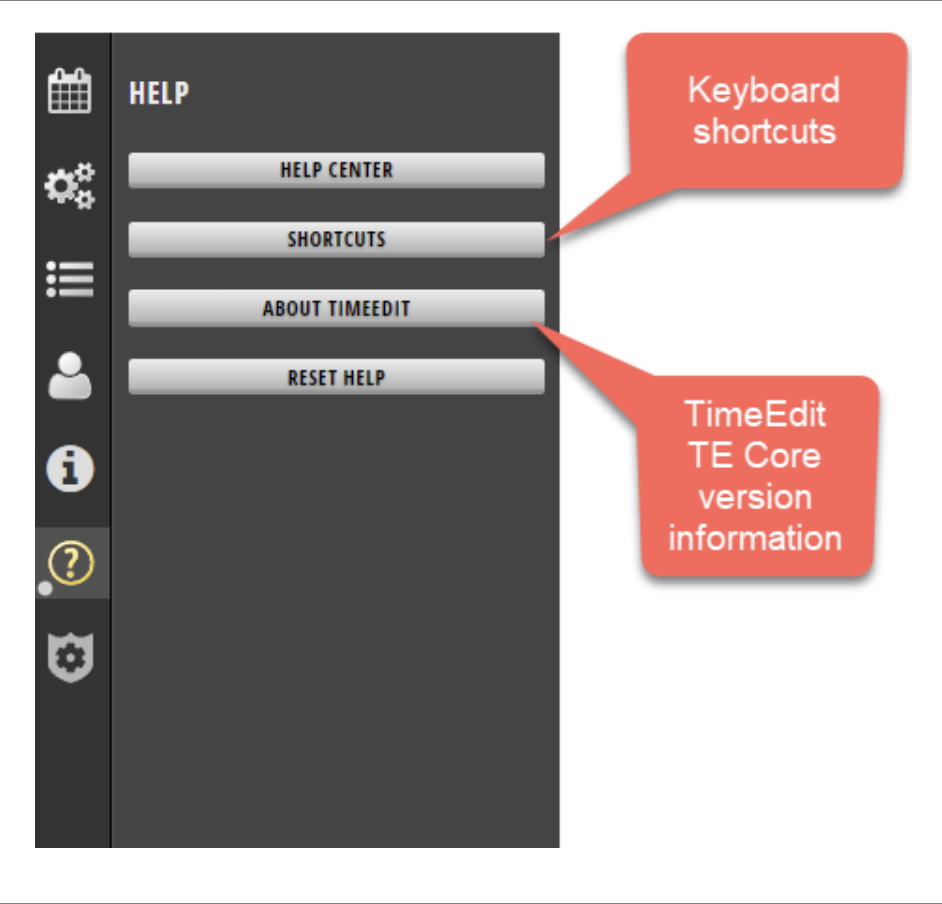
About TimeEdit
This menu item enables you to look up the TimeEdit version with the AboutTimeEdit button and a handy list of keyboard shortcuts. You can also access the help centre from here.