Introduction to TE Core

How to log in to TimeEdit's scheduling solution?
How to log in to TimeEdit's scheduling solution?
To connect and get started with setting up a schedule in TimeEdit, you need the name of your organization, e.g. "Stockholm University", your username and password. This information is provided by your TimeEdit administrator. TE Core is run directly in your web browser and no other software needs to be installed.
1. Go to www.timeedit.net in your web browser.
2. Click the TE Core link to proceed.
3. Find your organization. Your organization may have several databases. The database with [cloud] behind the name of your organization is the production database.

4. Click the ‘Log in’ link to log into TE Core. Another page will open where you are asked to enter the login details you received from your administrator.

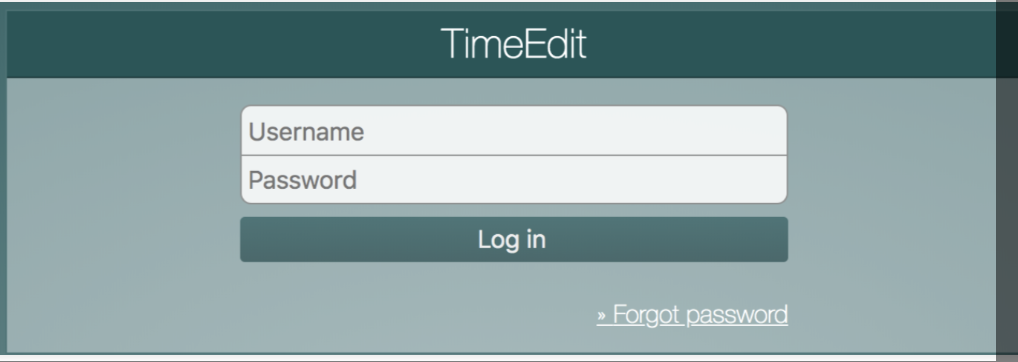
Forgot password?
There is also a "Forgot password" button here that you can use to request a password reset and a new temporary password that will be sent to your email address. When resetting, you can also choose an entirely new password when logging in.
Note: If this is your very first login, you will need to click "Forgot password" and have your password sent to your e-mail address.
Basic Terms in TimeEdit
Basic Terms in TimeEdit
When you work in TimeEdit and when you read our articles, you'll encounter a number of terms. We've listed those we feel are important to know so that it will be as easy as possible for you to begin scheduling.
Object
The resources that can be booked are called objects, e.g. teacher Robert Larson, room A112 and activity lecture.
Object Type
An object type in TimeEdit is the name of a specific type of object that can be booked. Examples of types are Teacher, Room and Activity.
The types that can be booked and what they are called are unique for each organization using TimeEdit.
Reservation
A reservation is an event containing a number of objects. Reservations include the date, start time, end time and a number of objects. They may also contain texts of various kinds. What object types are mandatory or optional in a reservation depends on each Reservation Mode (see below) and are unique to the configuration of each organization using TimeEdit.
Reservation mode
Reservation mode utilises rules that govern the types and objects that can be included in a reservation. Reservation mode examples for higher education scheduling – room and equipment reservations and staff activities. Reservation mode is also called booking mode.
Relationship
Objects can have relationships with one another. These relationships are used to make it easier for you to determine which objects must be booked together.
One example of a relationship is that instructor Robert Larson teaches courses in mathematics and physics.
Another example is that the Physics group takes courses in mathematics and physics.
Calendar
Reservations are created and edited in TimeEdit's calendar. The standard calendar includes dates and times. The calendar can be customised to user needs by creating what we call Views (see below).
View
A view is one or more calendar windows that are customised to user needs, such as desired total weeks, date intervals or similar. Users can create their own private views, and a system administrator can create shared public views.
Abstract and physical objects
An object in TimeEdit can be physical or abstract.
A physical object becomes unavailable when it is booked and it is not possible to make another reservation with the same object for the same time slot. Examples of objects that are normally physical are classes, groups, instructors and rooms.
An abstract object is included with information about a reservation, but does not prevent you from booking an object multiple times for the same time slot. Examples of objects that are normally abstract are subjects and activities.
Conflict Control
When you choose an object to book in TimeEdit, all reservations for this object appear directly in the calendar. Obstacles are indicated as solid grey or green reservations in the calendar. Transparent reservations in the calendar have no obstacles and can be booked over. These normally contain abstract objects.
Conflict control is managed in TimeEdit by defining certain objects to be physical. That is, they are to be treated as a physical object that cannot be in two places at once. Anything that is physical cannot be double booked without specifically overriding the conflict control.
Objects can also be designated as abstract, which means that they are not treated as physical and can be allocated to as many reservations as needed. This is used for adding useful information to the reservation without confusing the conflict management. For example, a program, e.g. Bachelor of Business, can be associated with many reservations but there is no need to keep all the reservations made for Bachelor of Business classes clash free.
It doesn’t matter which booking mode, or even which TE application, you are using, TimeEdit Suite will ensure that when a room or staff member is booked as a physical object it is unavailable everywhere. For example, if you book a location for teaching, it is also booked and unavailable for ad-hoc bookings in TE Reserve.
Objects with conflict control are indicated as solid grey or green reservations in the calendar. Transparent reservations in the calendar have no conflict control and can be booked over.
Windows and views
Windows and views
Calendar window, side menu, selected list, object list and reservation mode are terms you will often come across when scheduling in TimeEdit.The various menus are shown below along with information about what they are used for.
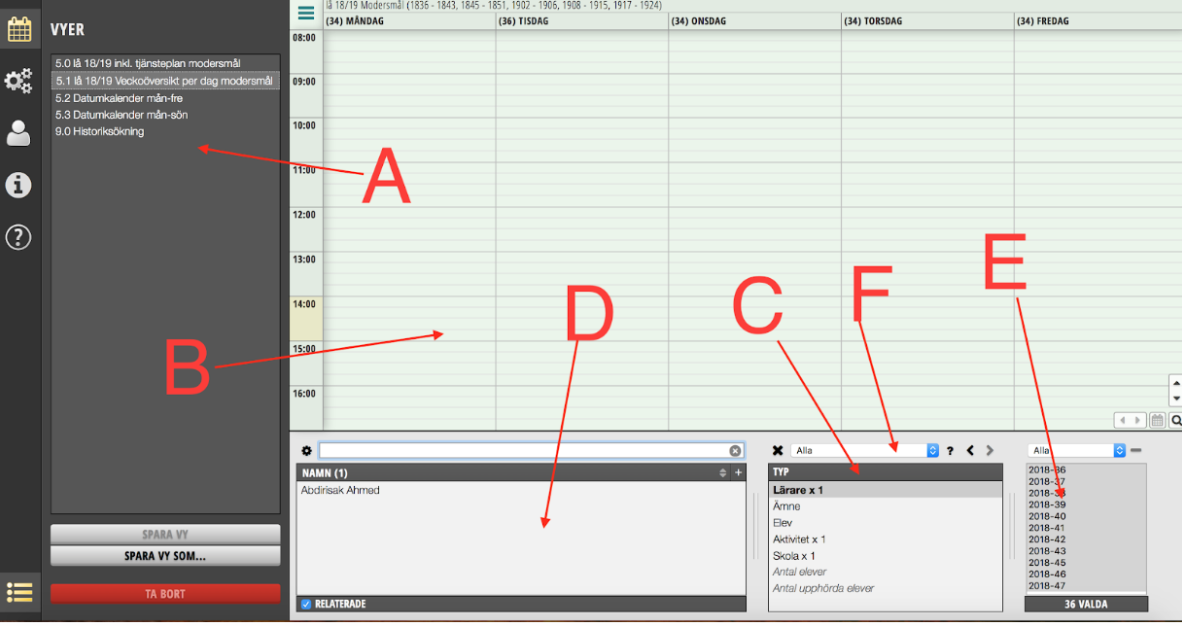
A – Side menu : This is where you choose the optimal view for what you want to schedule, and where you make your personal settings, find reservation information and more. To learn all about the side menu go to TE Core Side Menu explained.
B – Calendar window
D – Object list: The objects are shown here that you want to book, such as instructor "Robert Anderson" or room "A112".
C – Selection list: Shows the types of objects that can be booked based on the selected booking mode (see arrow F). Choose a type for viewing the objects on the object list (see arrow D).
E – Week list: This list is used to choose the weeks that your reservation will be linked to. This is referred to as cluster booking (overlapping reservations).
F – Reservation / Booking mode: This is where you choose booking mode, i.e. the type of reservation you want to make.
The selection list
The selection list
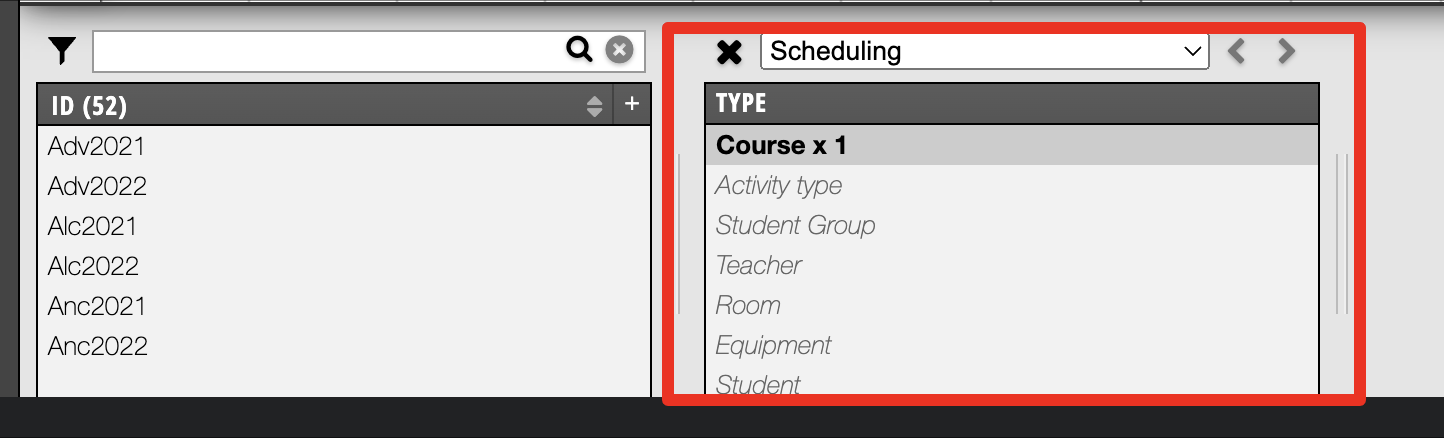
The selection list is the primary tool when you want to create reservations in your schedule. In the selection list, your mandatory and optional object types are listed, which you need to create a reservation in a specific reservation mode. What is shown in the selection list determines what you see in the calendar window, and what you choose on the selection list determines what is included in your reservation that you are creating.
The selection list description
The selection list is mainly used for two purposes. It is used both for selecting objects when making a reservation and for selecting individual objects or a combination of objects in order to view reservations.The selection list shows the types of objects that can be booked for the selected reservation mode, and also indicates which of these are mandatory to book. Mandatory types are indicated with " x 1". The types in italics are optional to book.
When you select objects to create a reservation, you must select objects until there are no longer any rows marked with "x 1" in the selection list. Note that there are often additional “soft rules” beyond the “hard requirements” specified by TimeEdit’s booking rules. For example, even if TimeEdit indicates that booking a room is optional, it is still not a good idea to book a lecture without a room since you might then have nowhere to hold the lecture and the students will not know the location.
Abstract objects on the selection list
Objects marked with an asterisk (*) are abstract objects.These are objects that do not become unavailable when they are booked. A common example is subject, e.g. the object English.
Physical objects on the selection list
There are also objects that are normally of the type physical, but where an exception has been made for certain objects. One example is room, which is normally physical but for which you sometimes want to indicate a place, e.g. Forest, which then makes it abstract (and thereby not unavailable once it has been booked).
Virtual objects on the selection list
Objects shown in italics are virtual objects. These are used when you order objects in TimeEdit and also when you want to indicate that you intend to book a specific object later, but do not yet know exactly which.
Clearing the selection list

Use the symbol above the selected list to clear it.
When you clear the selected list, the calendar is also cleared and no reservations are shown. This does not mean that the reservations have been deleted. It simply means that TimeEdit is not displaying them right now since you did not specify which objects you are interested in viewing using the selected list.
History
The arrows above the selection list enable you to step forward and backward between different combinations of selected objects. With the left arrow, you can go back to a combination of objects you recently booked.
Object List
Object List
One of the most important tools for your scheduling is the object list.
The primary purpose of the object list is to show which objects are available depending on the object type you have chosen on the selection list.
You can simply click on the object to add to a reservation. When selected you add it to the selection list.

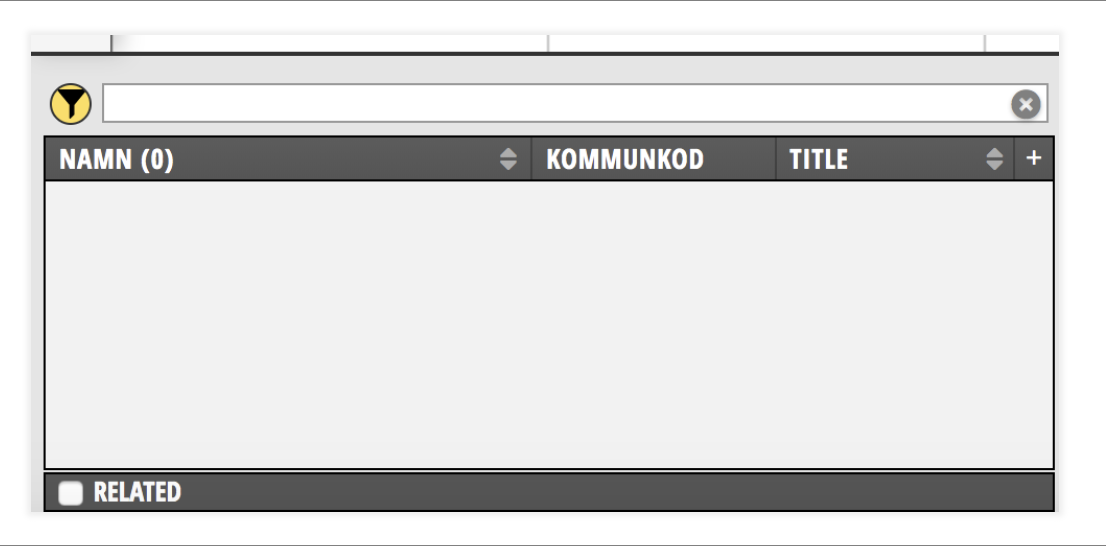
Object list searching
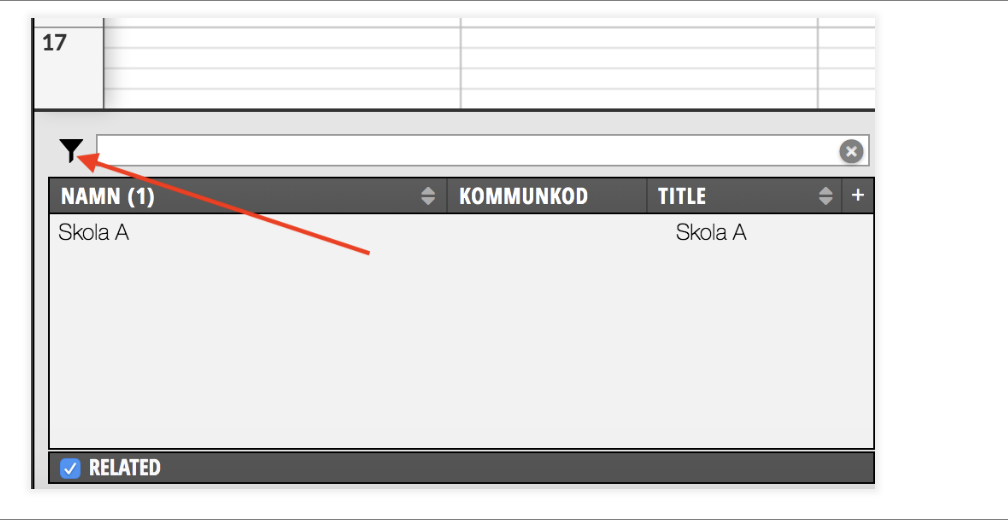
In the search field above the object list, you can search for objects by name, ID, number, etc. Simply enter what you are looking for, and objects matching this will be displayed on the list.

Category searches in the object list
Certain types of objects have categories for which you can apply filters. Common examples of categories are room type, building and department. If you select a category, all objects matching that category will be displayed on the object list. Follow these steps to select a category: REPLACE SCREENSHOTS
1: Click the icon to the left of the search field.
2: The various categories you can choose from will now be listed in the column to the left in the displayed box.
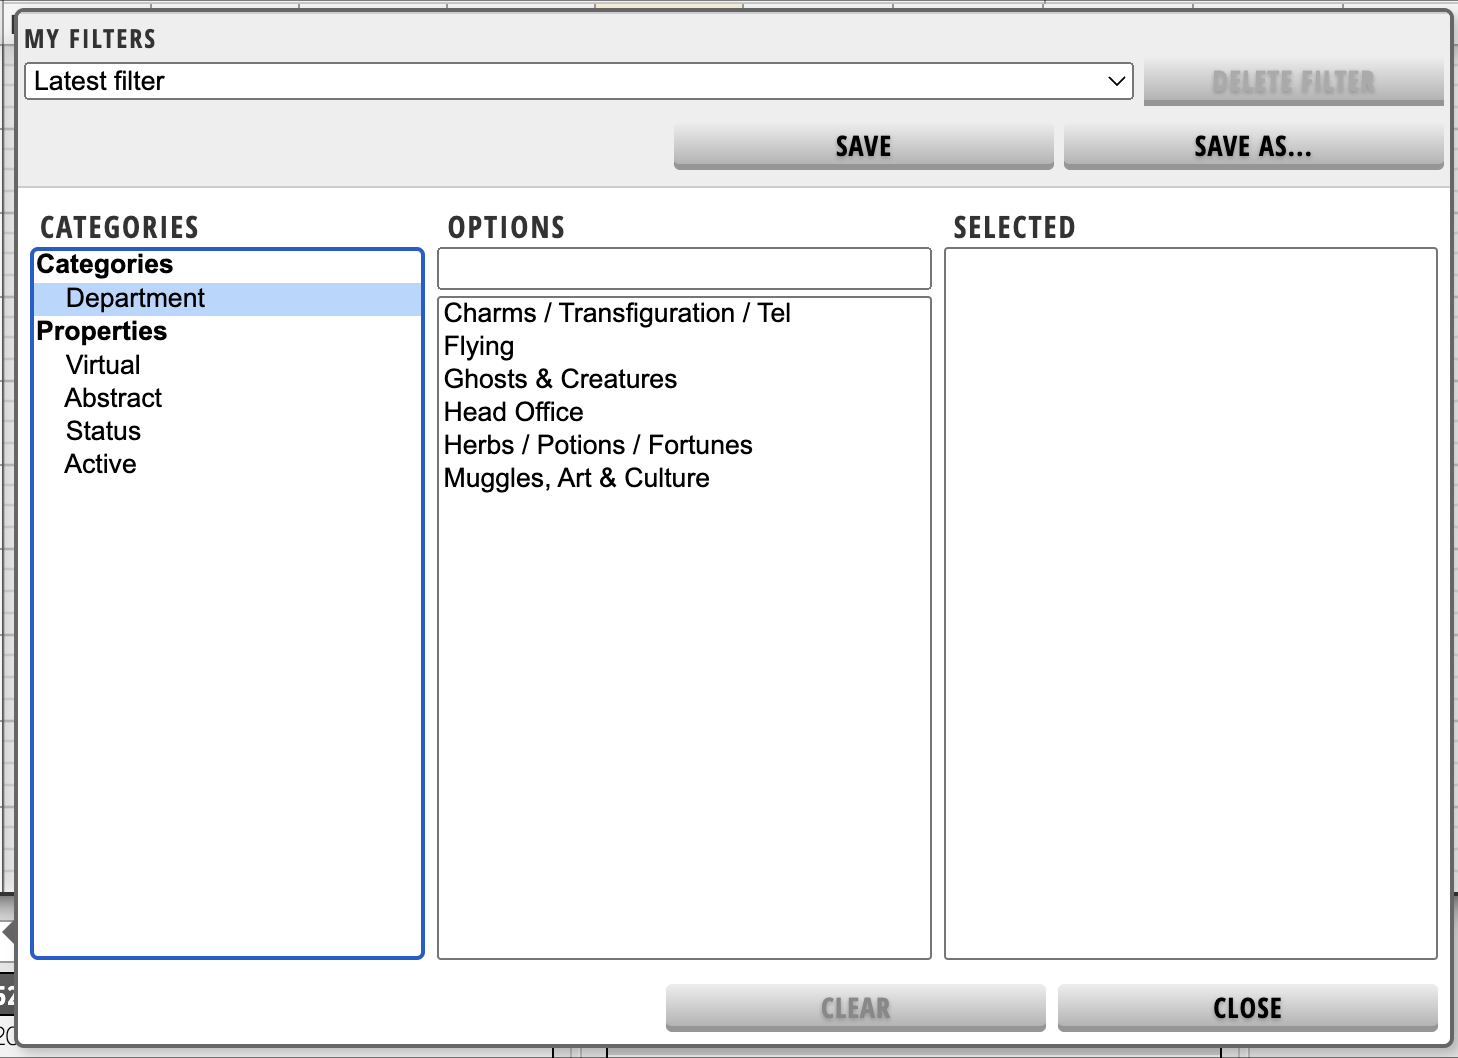
3: Choose the preferred category in the middle column. The chosen category is shown in the column to the right.The objects will now be displayed that match the category and the icon will be marked in yellow as an indication that the list is filtered.
Note that not all types of objects have categories. The categories available and the types of objects that contain them have been customised for your organization.
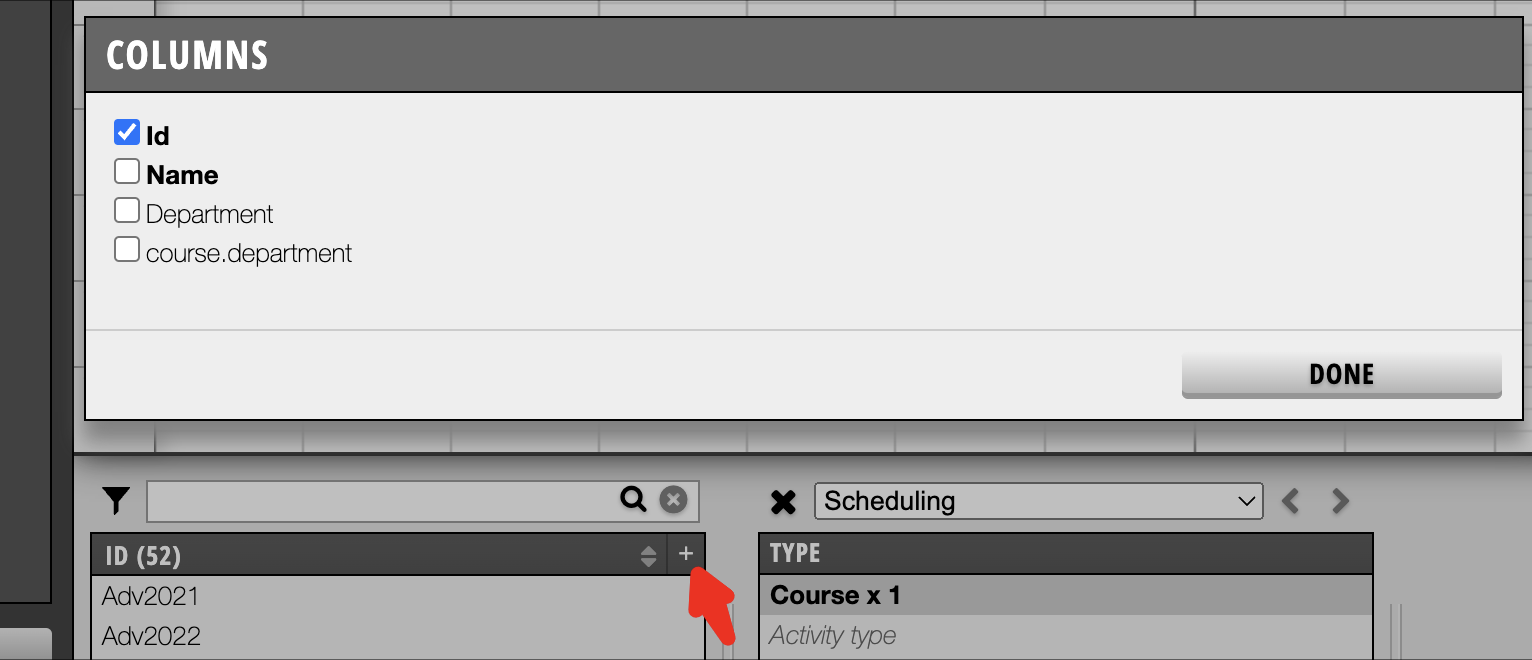
Settings in the object list
You can make settings for how objects are displayed on the object list in many different ways. One of the most common settings is for changing which information is displayed for each object on the list. For example, for rooms you can choose to display the room number and/or room name; for courses you can choose to display the course code and/or course name and so forth.Follow these steps to specify how a specific type of object is displayed on the object list:
1: Click the + sign in the right upper corner
2: Choose between the different available columns
Object list sorting
You can sort in descending or ascending order by clicking the double-headed arrow to the right in each column heading. If there is no double-headed arrow in a column, this means that the field in the column is not sortable.