Group details in Allocate
In allocate overview all details and settings for a specific group can be accessed in the drawer by selecting a group. This guide provides detailed information about the options available for configuration within the drawer.

Overview of the drawer
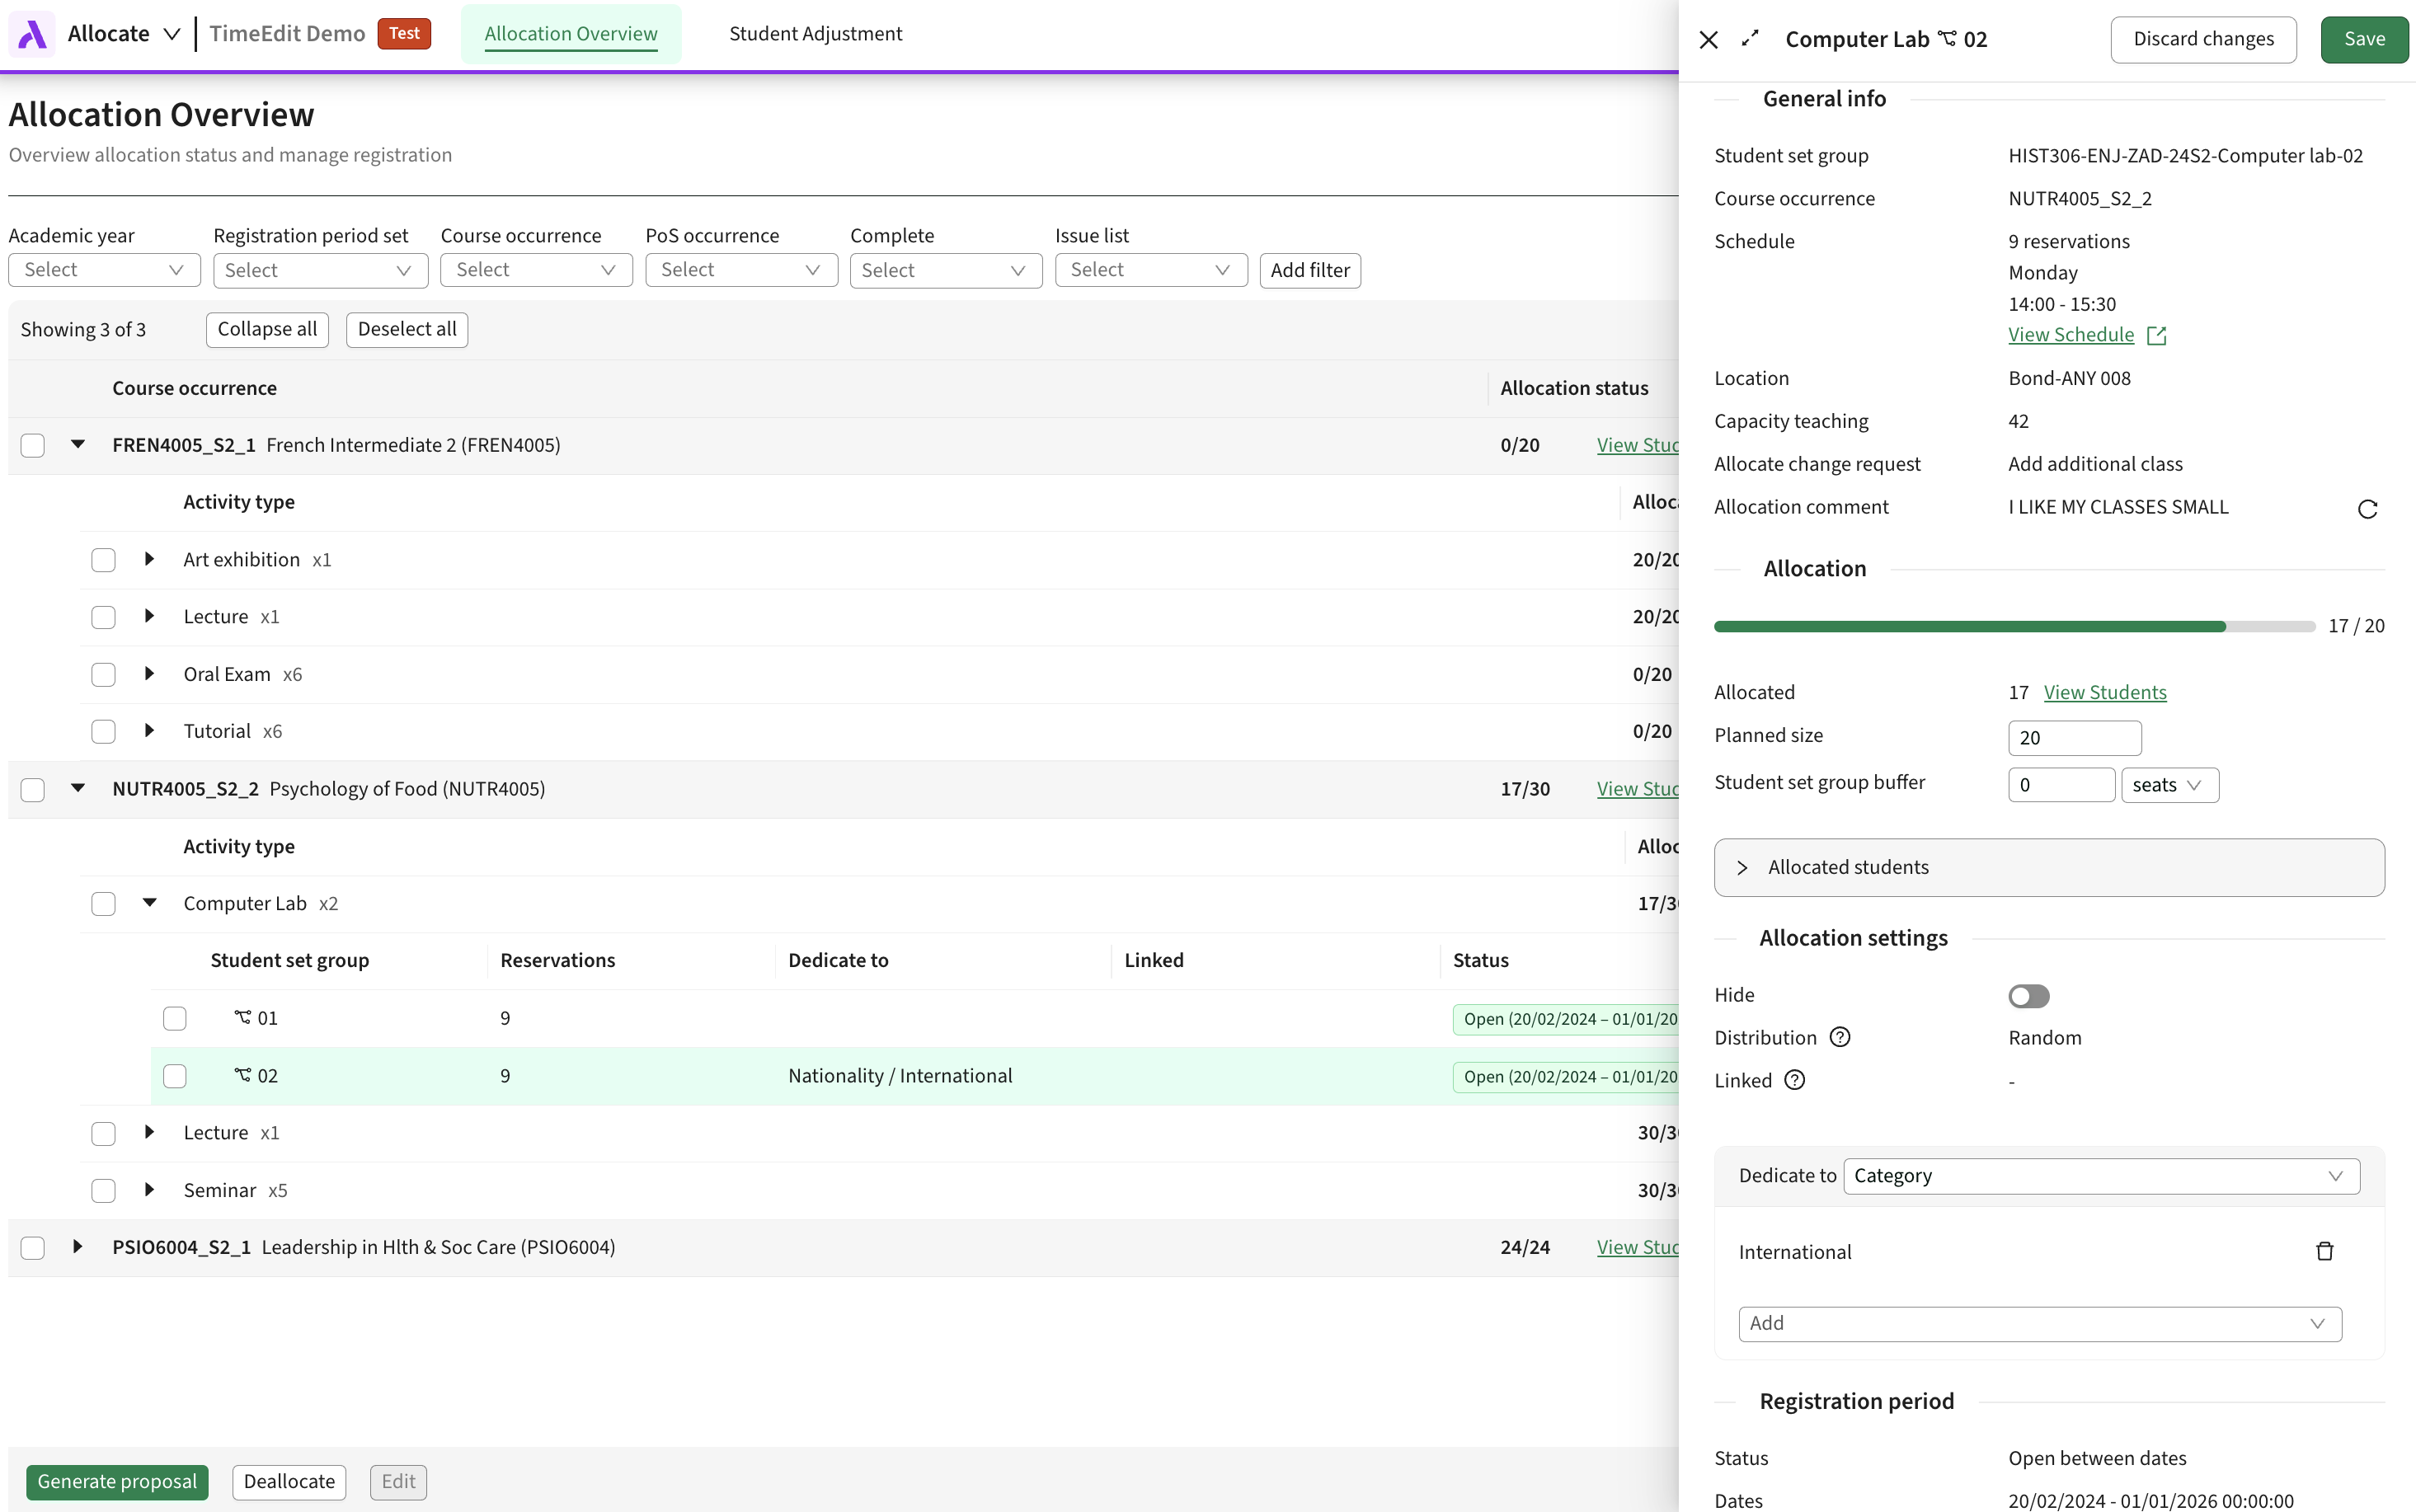
General info
The General Info section provides additional details about the group, including room size information retrieved from reservations.
If configured, a comment field will also appear, typically used for communication about change requests or preference collection related to the group.
Allocation
This section displays the current allocation status. For further details, see the Allocation section below.
Allocation settings
This section displays the current allocation settings, instructions to the algorithm how to allocate or how students are allowed to register to a group. For further details, see the Allocation settings section below.
Registration period
To enable student self-registration, set the opening and closing times in the Registration Periods view. If configured, these settings will be displayed here.
Note: Naming can differ depending on configuration of the product
Allocation: Allocated

This shows the group’s current allocation status, including capacity (Max Size), buffer, and the number of allocated students. The View Students link directs users to the Student Adjustment page with a filter to view students in this group.
In this example 17 students are allocated to the group, which has a max size of 22 students, and there are 3 seats in the buffer, indicated by the shadowed section.
Allocation: Max size

In this example max size is 22 students, this number is configurable from the drawer, any changes require confirmation to prevent accidental changes.
Max size sets the maximum number of students that can be allocated to, or register to the group. The system will not allow this number to be exceeded. If the limit is decreased to below the current number of allocated students the system will not remove any students, the needs to be done manually.
Allocation: Buffer

Buffers reserve a certain number or percentage of seats, making them unavailable for allocation or self-registration. In this example buffer is set to 5% which will be converted into 3 seats. Buffers can be used to:
- Reserve seats for late-enrolling students
- Hold spots for students with reasonable adjustments
- Allow for flexibility to help with student scheduling adjustments
Buffer can be bulk edited from the Edit button in the footer of the table.
Allocate users can override the buffer when managing a student in Student Adjustment.
Allocation settings: Hide

The Hide toggle removes a group from allocation and self-registration. This feature is helpful for:
- Exclude a group which capacity is not deemed to be needed
- Exclude all groups of an activity type, where allocation or self-registration should not be done at the moment
Allocate users can allocate students to a hidden group when managing a student in Student Adjustment
Allocation settings: Dedicate
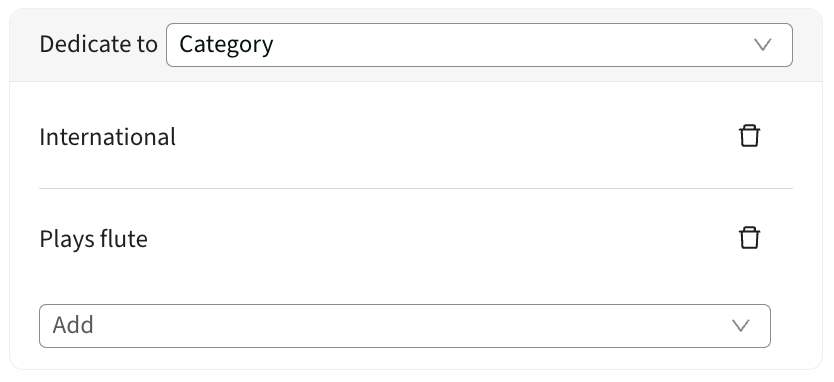
Dedicate allows you to dedicate a group to one or more student categories. In the example students belonging to category International or Plays flute can be allocated or register to this group. Note that students belonging to these groups will not be able to be allocated to any other groups that are not dedicated to the matching categories.
Allocate users can override dedication rules when managing a student in Student Adjustment or when allocating students manually.
Allocation settings: Linked
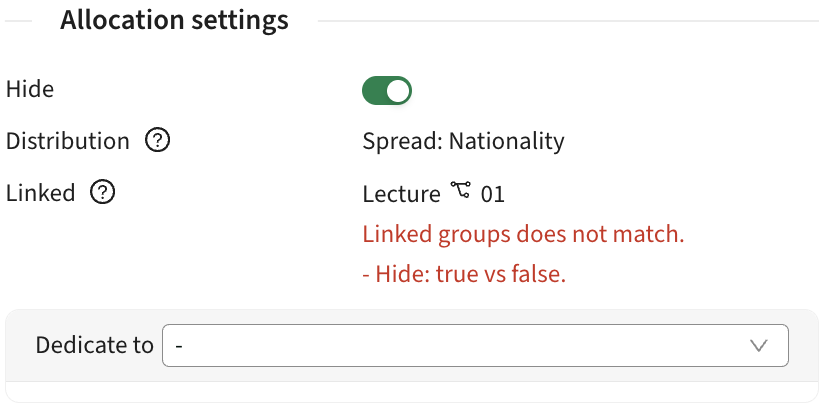
To achieve coherent groups of different activity types within one module it is possible to link groups together into pairs this is done with the Edit button. This will force students to be allocated and register into both groups. In this example the selected group has been linked to Lecture 01, note that there is also a warning, that the group is hidden. Its important to have identical configuration of linked groups.
How it works
Linking a group for Activity-A with a group for Activity-B allows students to be allocated or register for both in one step.
Requirements when linking groups
- Ensure linked groups have equal capacity and identical buffer settings.
- Avoif hiding or dedicate tracks.
- For self-registration, verify that the registration period aligns across all linked tracks.
- Link each Activity-A group to its corresponding Activity-B group.
Students not allocated to both groups
Allocation or self-registering into linked groups means that two group memberships will be created, in rare occasions this can fail and a student only becomes member of one of the groups.
If a student is only assigned to one group despite linking, adjust the student’s membership by unregistering and re-registering them via managing the student in Student Adjustment.
Allocation settings: Distribution
Distribution can be set from with the Edit button. It gives the allocation algorithm en intruction to spread students evenly based on the selected student attribute.
Allocation: Allocated students

Allocated students can be expanded to display a list of all students allocated to the group. Here you will also find the Allocate students button to manually allocate students.