Study Guide: basic configuration and administration
The Study Guide is highly configurable by the Administrator using the configuration options. This administrator guide focusses on the basic setup of the system, that will proceed the actual configuration of the user experience.

Manage academic years
The academic years that have been interfaced to the study guide are available via the administration menu.
Go to the Administrator -> Academic years to open the Academic Year management screen.
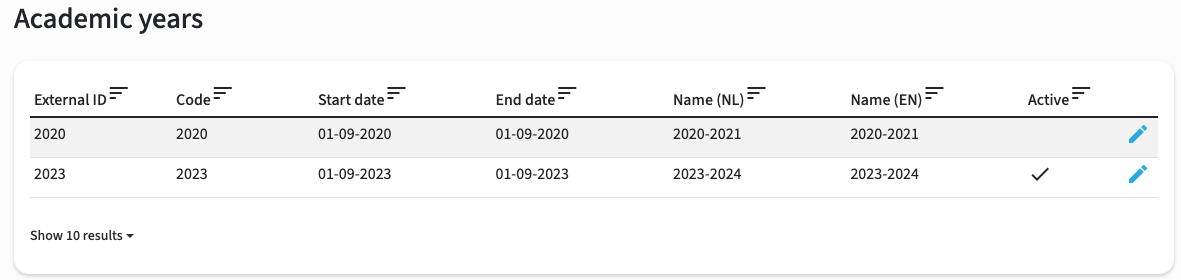
Use the pencil to configure the visibility of the academic year.
In the example the year 2023-2024 is active and therefor available to the study guide users.
In case multiple years are 'active' a toggle is provided to the users to switch between the 'active' years.
Adding new academic years is not managed via the Academic Years section.
A new year is automatically created via a manual import of a new year. If the import succeeds, the year is added to the list of academic years and can be configured as active.
Go to Administrator -> import to start the import of an existing or new year.

Import results (ad-hoc and scheduled)
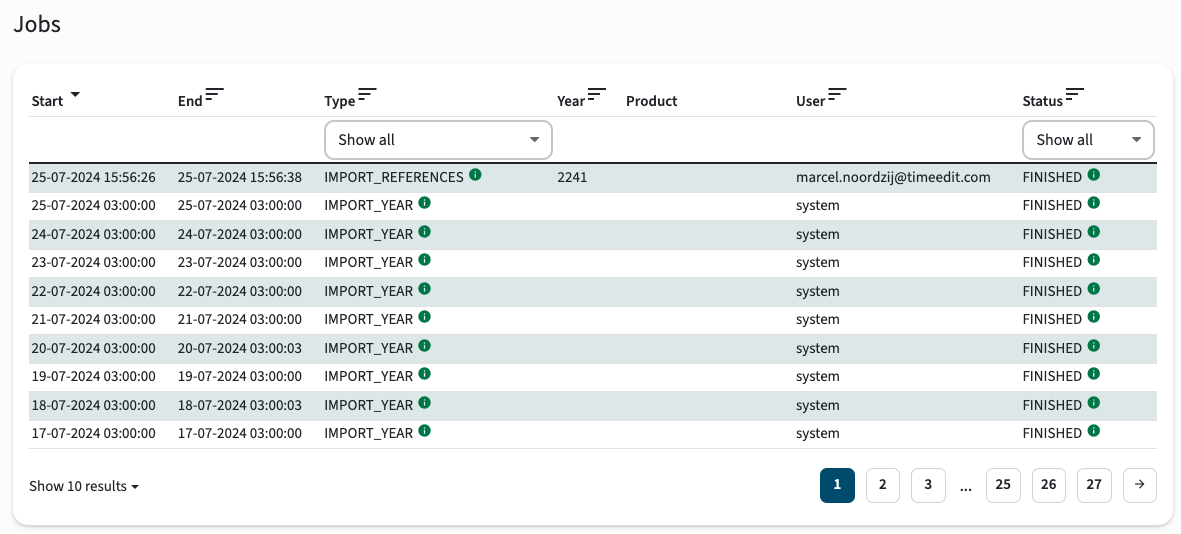
The Job report provides an overview of all import actions that has been executed, the duration and the status.
The example below shows the overview of the daily schedule import job that imports all data for a given academic year, and an ad-hoc import for only the references.
The synchronisation can be executed:
- Scheduled: the system administrator has configured a time the entire study guide is synchronised
- Ad-hoc (complete): the administrator can execute an ad-hoc synchronisation of the entire study guide (Go to the Administrator -> Import)
- Ad-hoc (study, group, module): the administrator can execute an ad-hoc sync of an object via the Import button on the object detail screen (user interface).
- Ad-hoc (references): the administrator can execute an ad-hoc sync of the references from the References overview report.
Synchronisation will run in the background.
Go to the Administrator -> Jobs to open the Jobs report screen, and validate the status of the Job.
Manage references
The References option is used to manage the reference information automatically imported from Curriculum and shown to the users in filters and details pages.
Go to the Administrator -> References to open the reference management screen.
The screen below shows the configuration for the reference list 'difficulty' that is provided as just numeric codes by the curriculum management system.
The Import button at the right top corner can be used for an ad-hoc synchronisation of only the reference information.
The detailed configuration of the user interface will also enable to show only the label (default behaviour) or a styled combination of code and name.
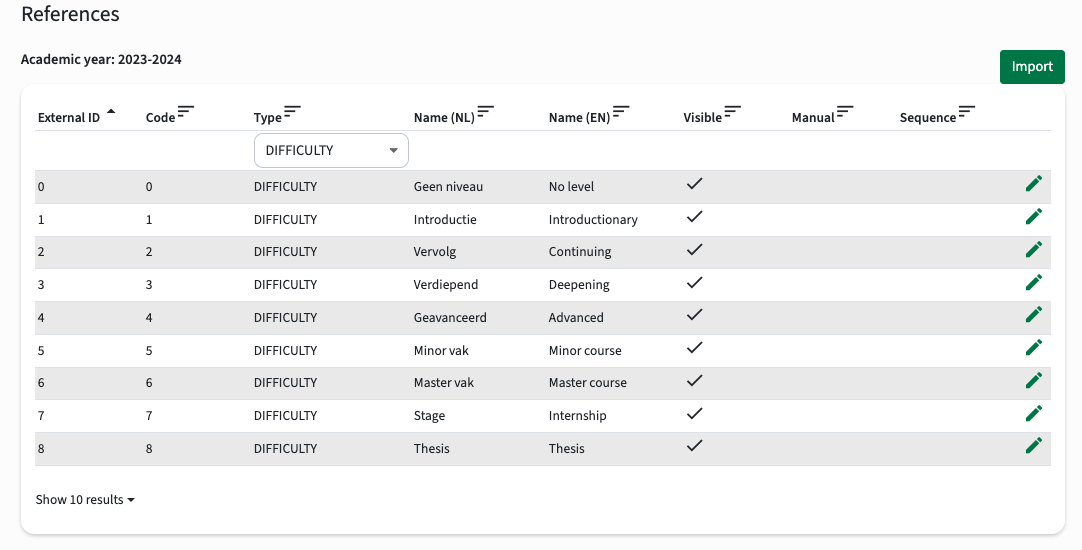
Use the select box for Type to switch between the different imported reference types. The options shown are the different values for references that have been imported from Curriculum
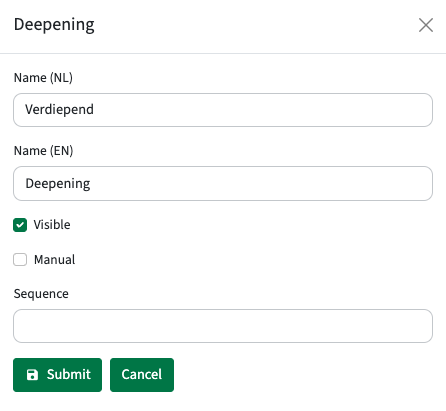
Click on Edit to modify an existing reference item configuration.
The example below shows the configuration for the reference item DIFFICULTY Deepening (code = 3). The code cannot be changed, to prevent admins from breaking it ;-)
Options:
- Name: name / label shown to the user for the reference item
Depending on the system configuration the name for the configured languages can be set. - Visible: defines if this specific value should be shown to the user, or should not be shown. This option can be used to limit the offered filter options.
- Manual: defines this value has been adjusted manually and should not be overwritten by the automated import function
- Sequence: the order of the option in a filter.
Configure labels
The configure labels option is used to define the different labels used in the application. Labels are all texts (links, fixed, buttons, messages) that are standard offered by the application and that are NOT customer data related. The labels used in the customer data context are configured via the menu option.
Go to the Administrator -> Labels to open the label management screen.
Use the top-filter to search for specific labels and use the Language selector to only select the relevant language.
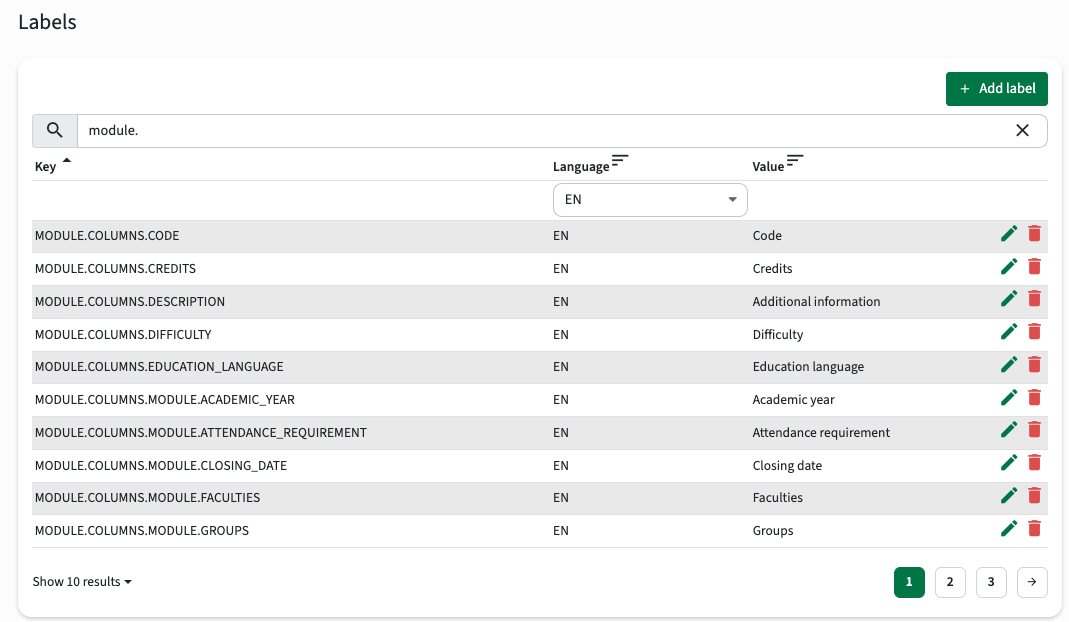
The example below shows the configuration of the label for the module education language.

Validate offering periods
The periods that have been exchanged to the study guide are available via the administration menu.
Go to the Administrator -> Periods to open the Period validation screen.
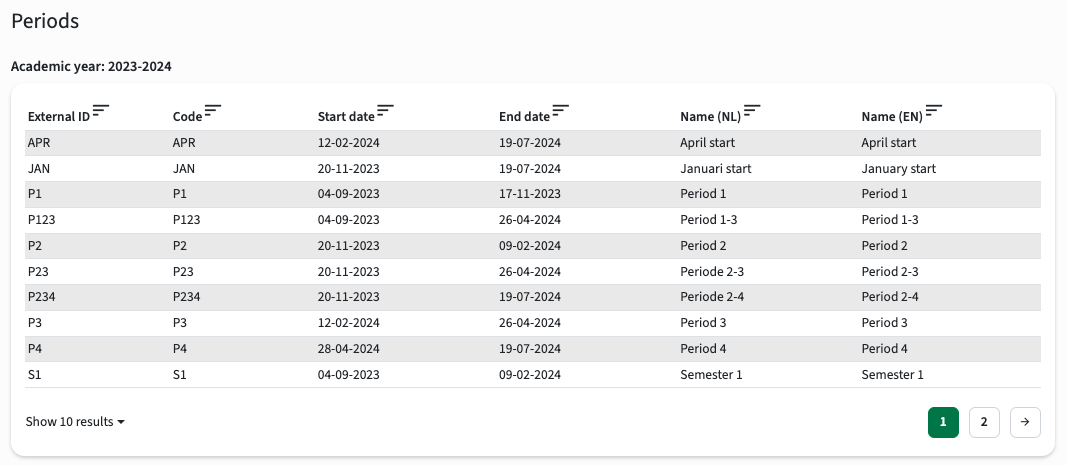
The report on periods is for validation only and can be used to check if all periods have been exchanged from the source system.
Configure parameters (system settings)
The generic behaviour of the study guide is defined using the Parameters.
Go to the Administrator -> Parameters to open the Parameter configuration screen.
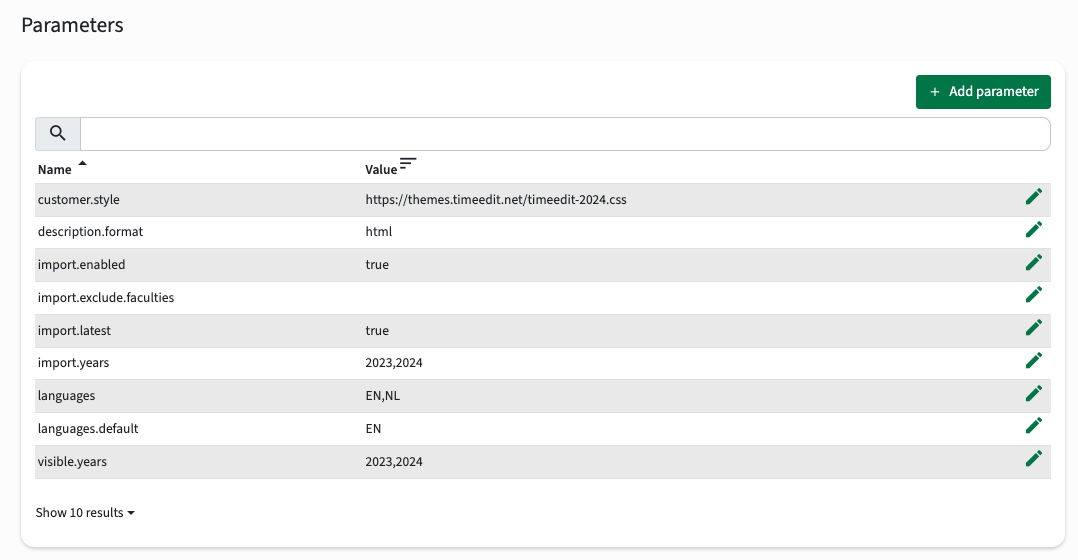
Supported configuration options are:
- customer.style: configuration that enables usage and switching between different visual themes (end user)
- description.format: the format used to render the descriptive texts. Supported values are html and markdown
- import.enabled: configuration to enable the execution of the scheduled 'full synchronisation job'
- import.exclude.faculties: configuration to exclude the import of faculties (and faculty information)
- import.latest: configuration if the 'published' information is synchronised, or if the 'latest' (and not yet approved texts) is synchronised
- import.years: configuration of the (academic) years to be synchronised. Multiple years can be defined, separated by , (e.g. 2022, 2023)
- languages: configuration of the languages supported in the user interface.
- languages.default: configuration of the default language if this cannot be detected automatically
- visible.years: configuration of the years that will be available for the users. Multiple years can be defined, separated by , (e.g. 2022, 2023)
Configure visible years and validation of not yet public available year
Independent of the visible year configuration all active years defined, will be available for the administrator. This allows for validation of a new year by the administrator prior to open it for the users.
The configuration options used are:
- The year configuration attribute 'active'
This attribute is used to define which configured years are actively synchronised and potentially available for users. e.g. 2023, 2024, 2025 - The system setting 'visible years'
This setting which years are available for users, e.g. 2023, 2024
Embed study guide in an external portal / web page
Embed full study guide
In order to embed the full study guide in an external web page / portal use the underlying code.
The HTML code used to embed is:
<html>
<body>
<h1>Embedded study guide</h1>
<iframe src="https://<URL to studyguide>/studies" width="500px" height="500px">
</iframe>
</body>
</html>
In this case the study guide will open directly with the overview of the studies. By adding another or no path the standard landing page used for the embedded study guide can be manipulated.
Embed study guide page
The above option is used to embed the full study guide, including navigation and filters, in another web page using an iFrame.
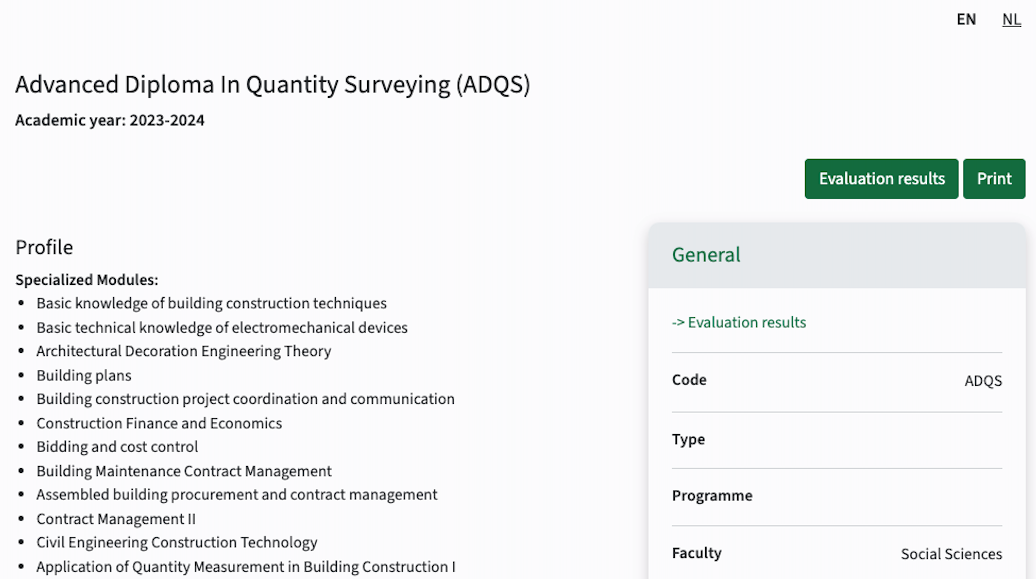
In case the information to be shown is known it would be helpful to only show the detail page with the relevant information without navigation and filters. This option is added in this release, where a dedicated information page from study guide can be embedded in the desired language.
Configuration of the URL:
The URL will follow a standard convention and has four attributes to show the desired tab:
- URL base: https://<your link to the study guide>/
- URL extension:
- studies/<study_code>
- modules/<module_code>
- Page to show:
- tab=<page_name>
- Year to show
- year=<year>
- Indicator to only show data
- data_only=true
- Language indicator
- language=NL
- language=EN
- no language specified will show the language switcher in case of a multi-lingual configuration
The full URL could look something like:
https://studyguide.timeedit.dev/studies/ADQS?tab=study-general&year=2023&data-only=true&language=EN
This option is supported for all data pages and widgets, such as the curriculum mapping matrix, module detail page, study structure page.
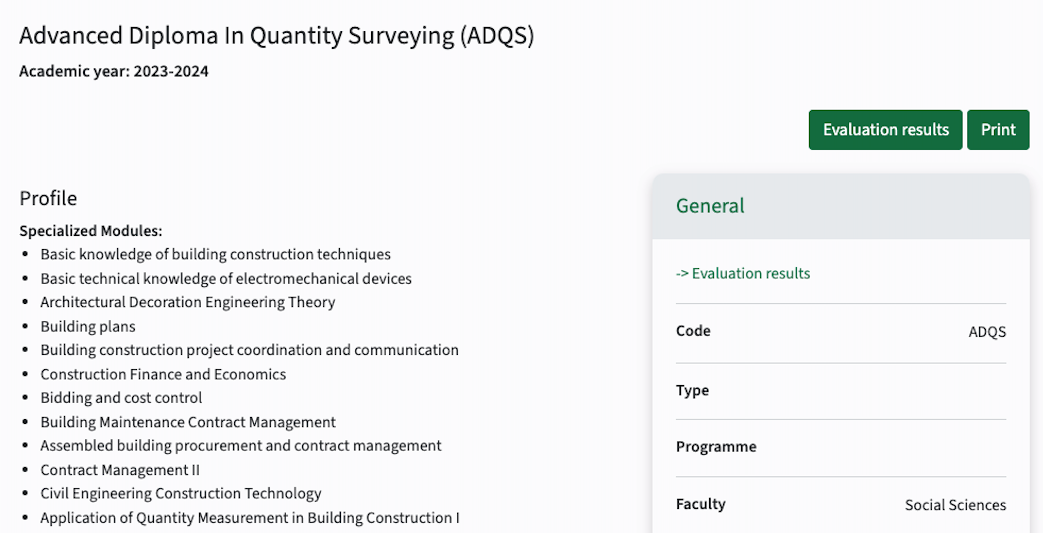
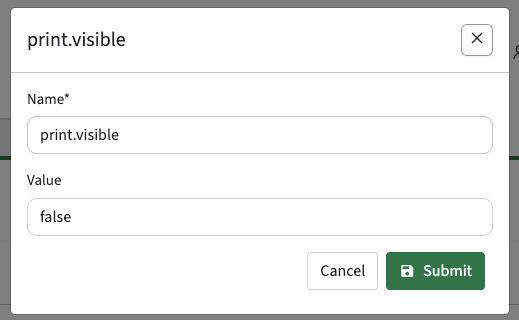
Manage print button behaviour
The print button is default shown on each page in the study guide. An option is added to disable the Print button on all pages using a global configuration parameter.
Configuration:
- Navigate to the Parameter menu under Administration
- Set the print.visible parameter to false (hide) or true (show, the default value)
Configure a generic banner
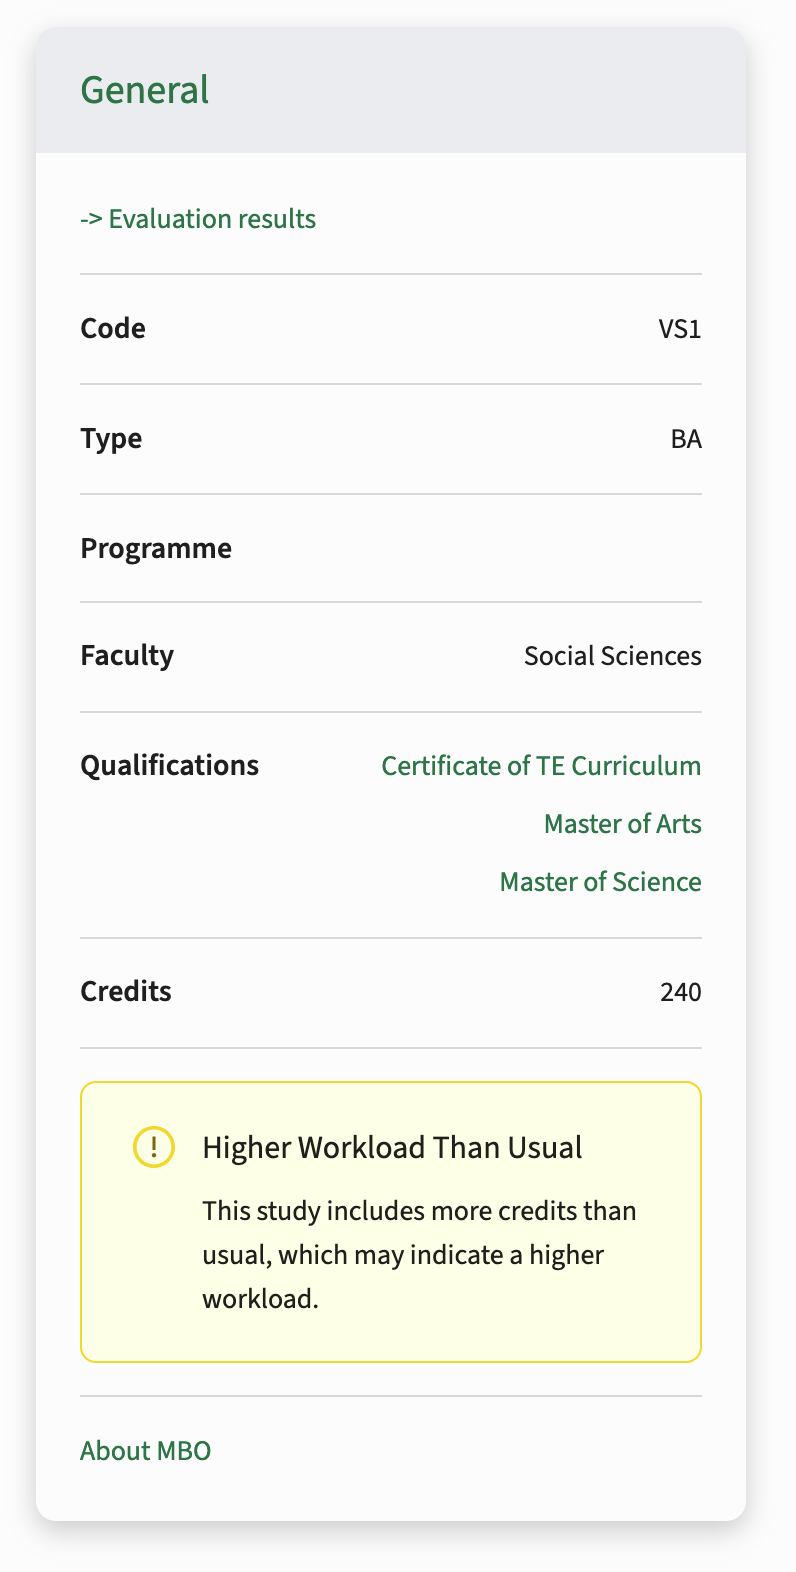
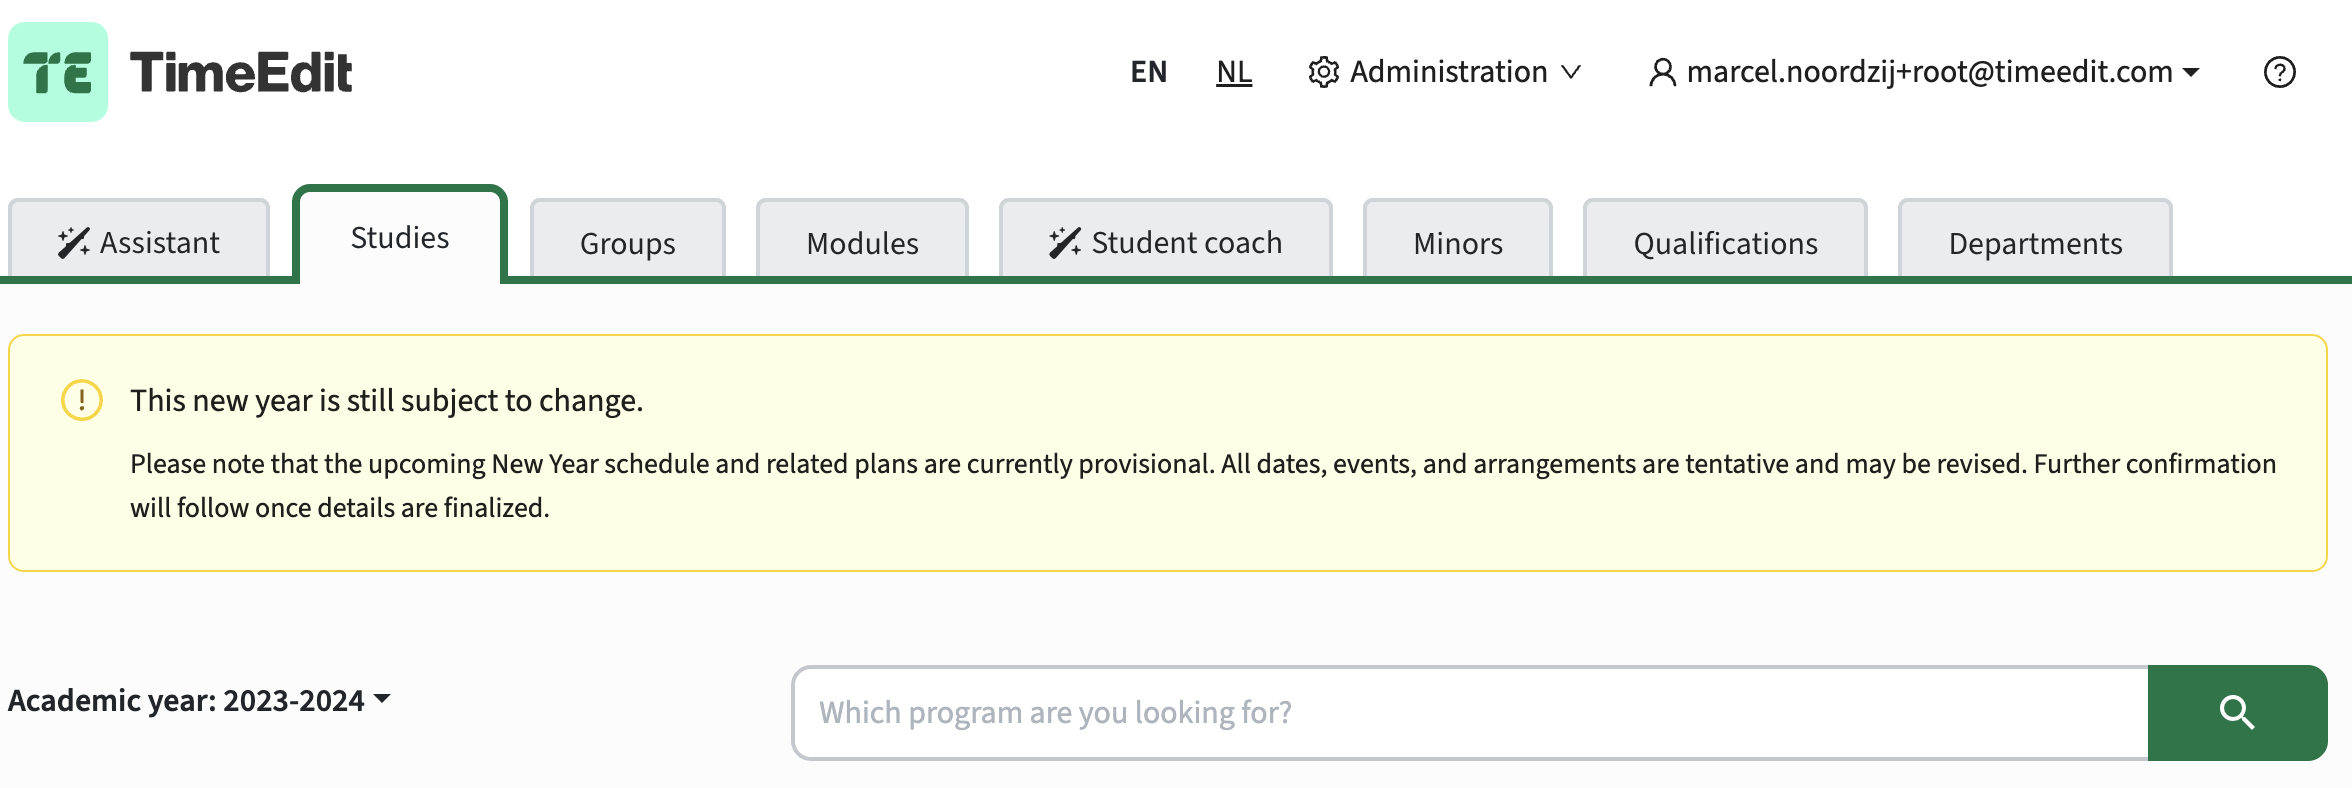
The functionality of the study guide is enhanced to support 'banner-like' information display. For example an highlighted information message shown in a tab or all tabs to highlight a year is not fully published.
The information display is available as a widget, which means all options of using widgets on tabs are supported for this new banner widget. Let's first look at the configuration and display the corresponding notification display.
Configuration:
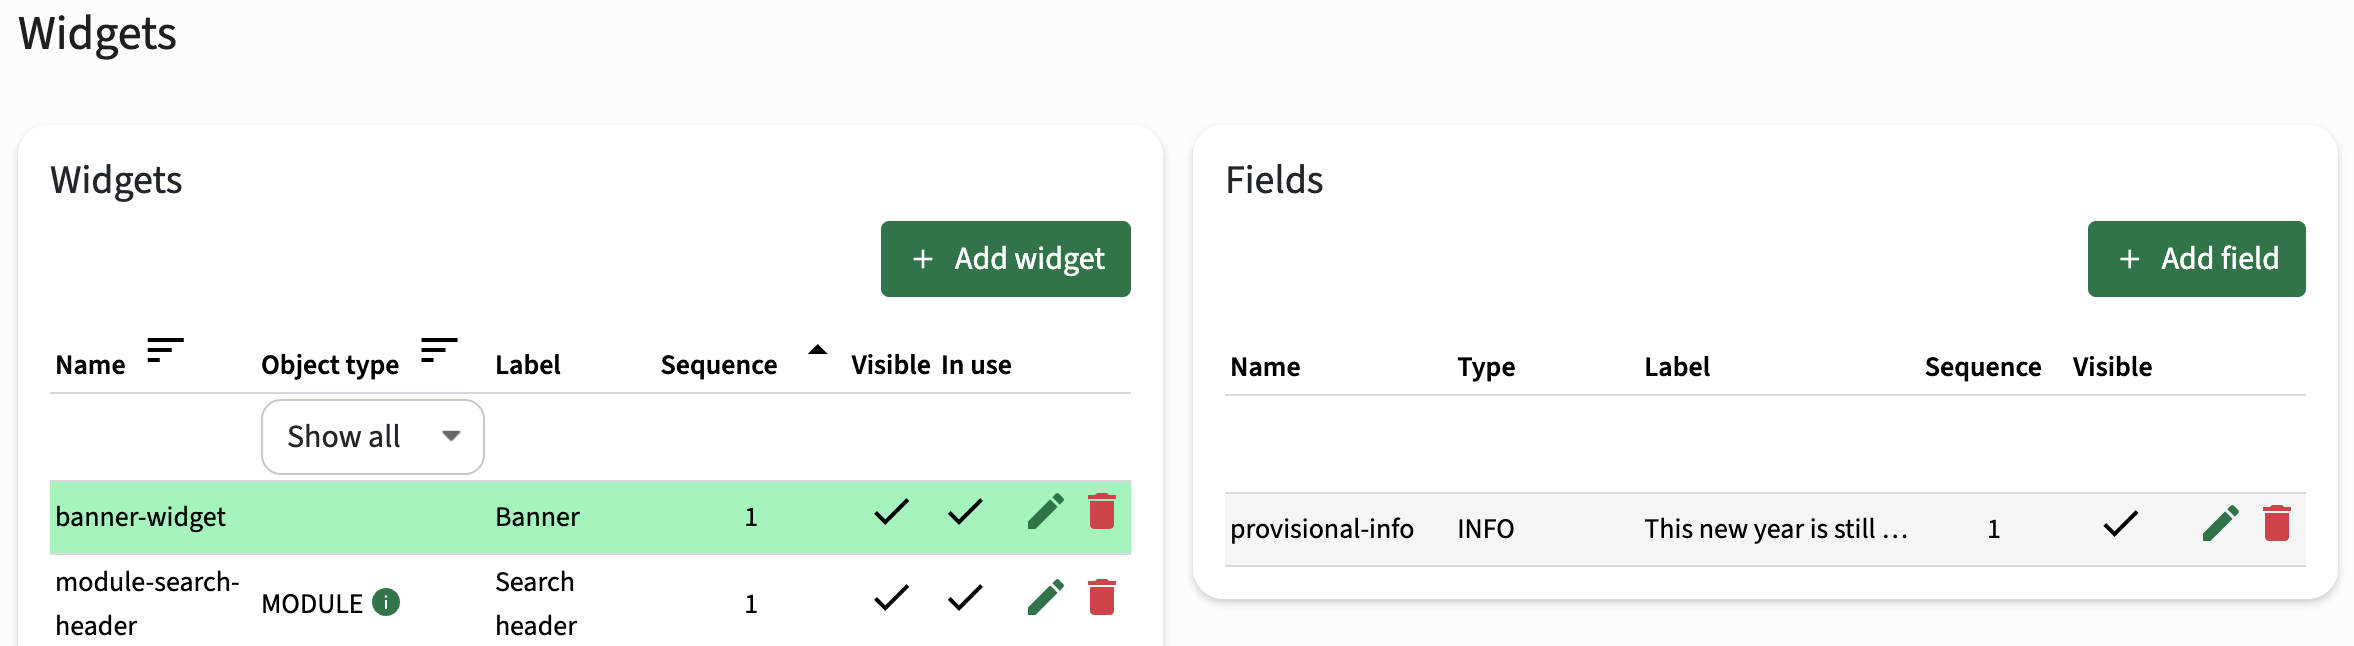
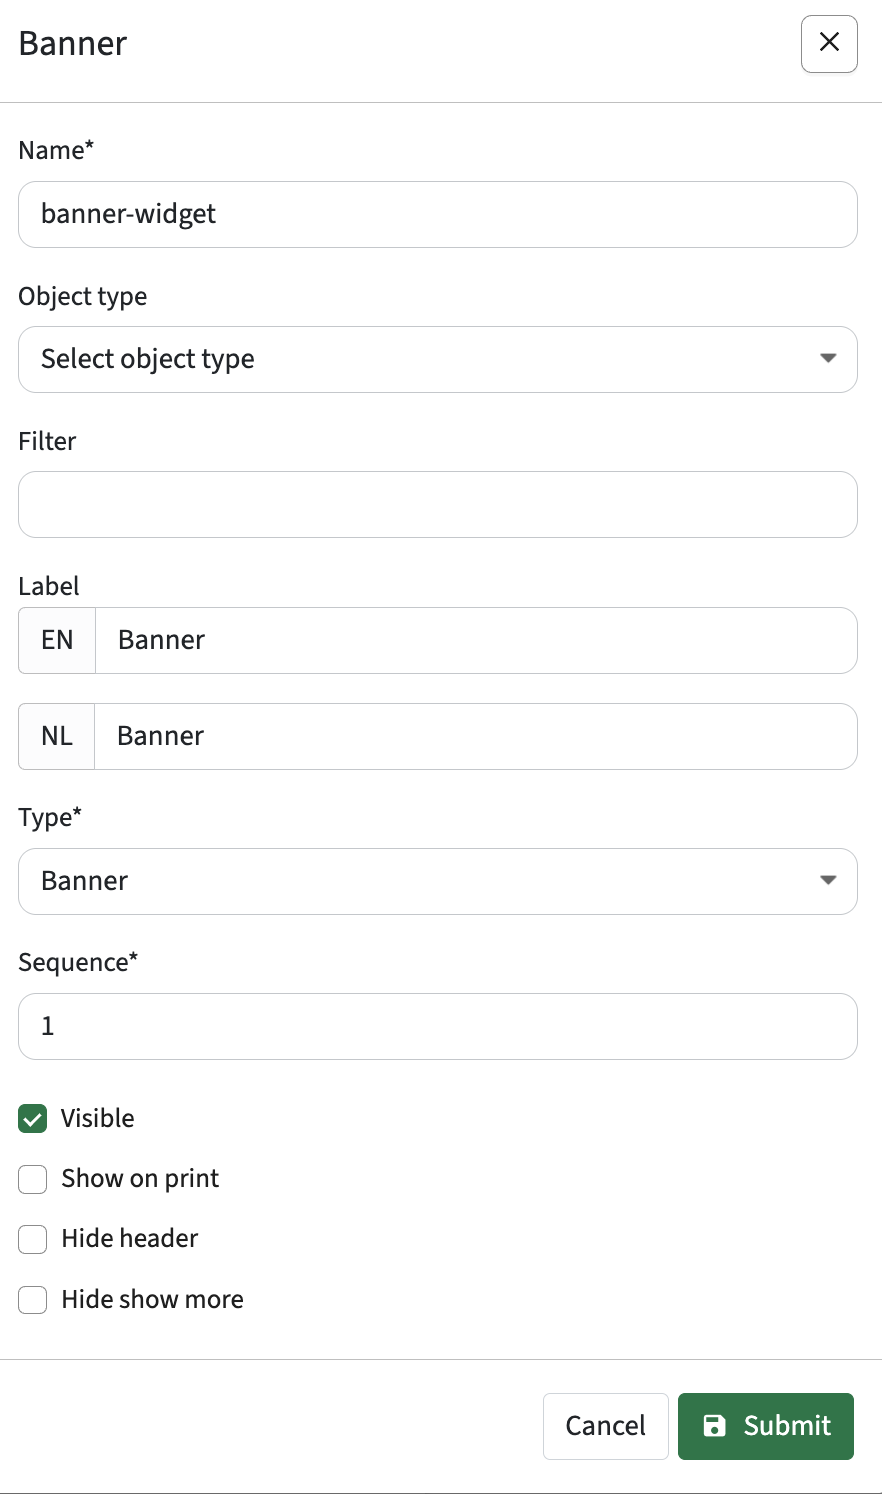
- Add a widget of type
BannerThe widget canshown:- Main tabs, between topbar and breadcrumbs. Usable on main tabs (e.g. study list)
- Detail tabs (e.g. study ABC-1)
- Sub-tabs (e.g. study/detail)
- Fixed positions (e.g. sidebar sequence 4).
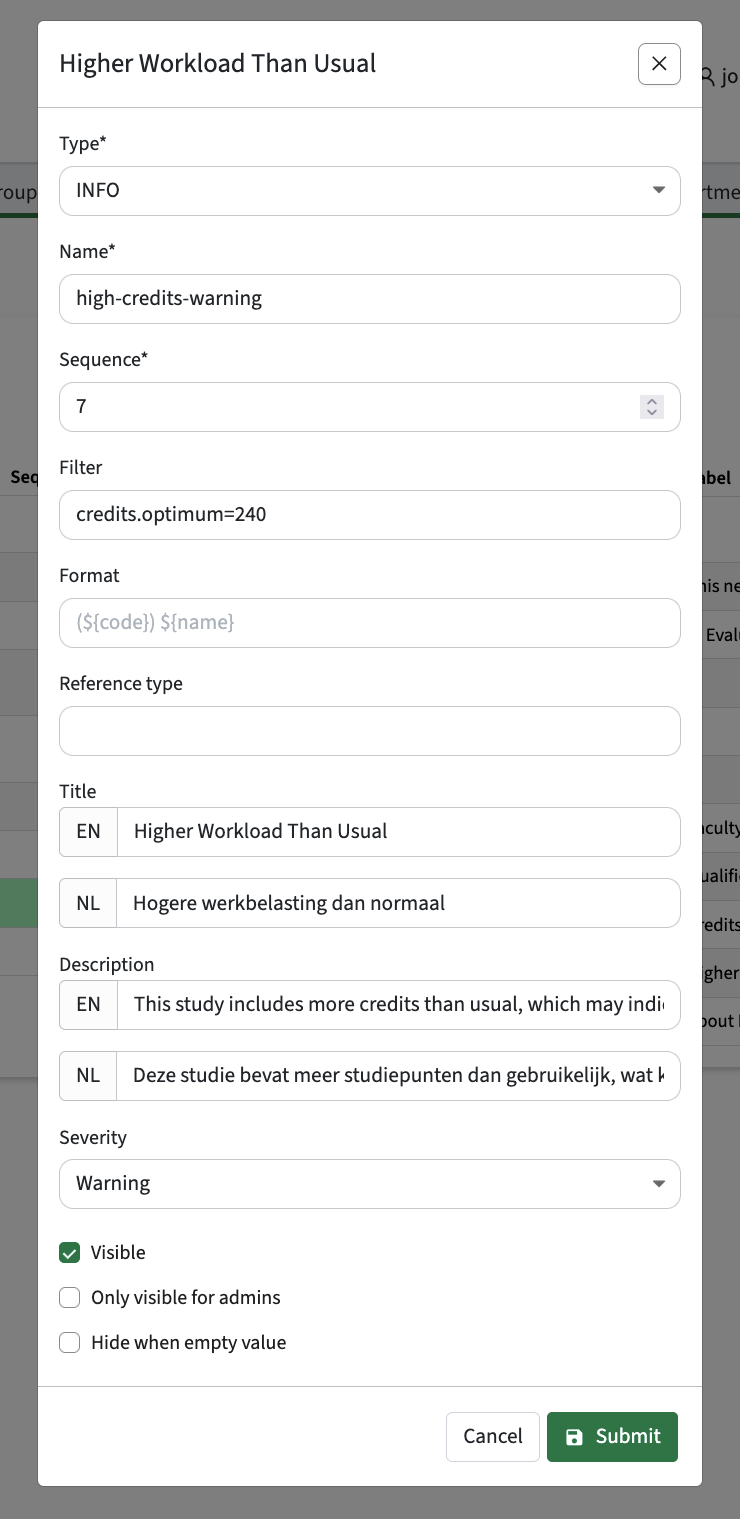
- Select widget field type
InfoThe widget isshown as an alert with configurable Severity. Severity is only shown for INFO widget fields; cleared otherwise. - Use Title and details (where other widgets use label and tooltip) .
- Optional define a Filter to restrict the display of the widget. Added shortcuts:
credits→ credits.[opt/max/min]language→ language.externalIdyear→ currently selected year.id (the year selected in the dropdown)
- Add the banner to the relevant Page(s)
Add a banner to be shown on a main tab
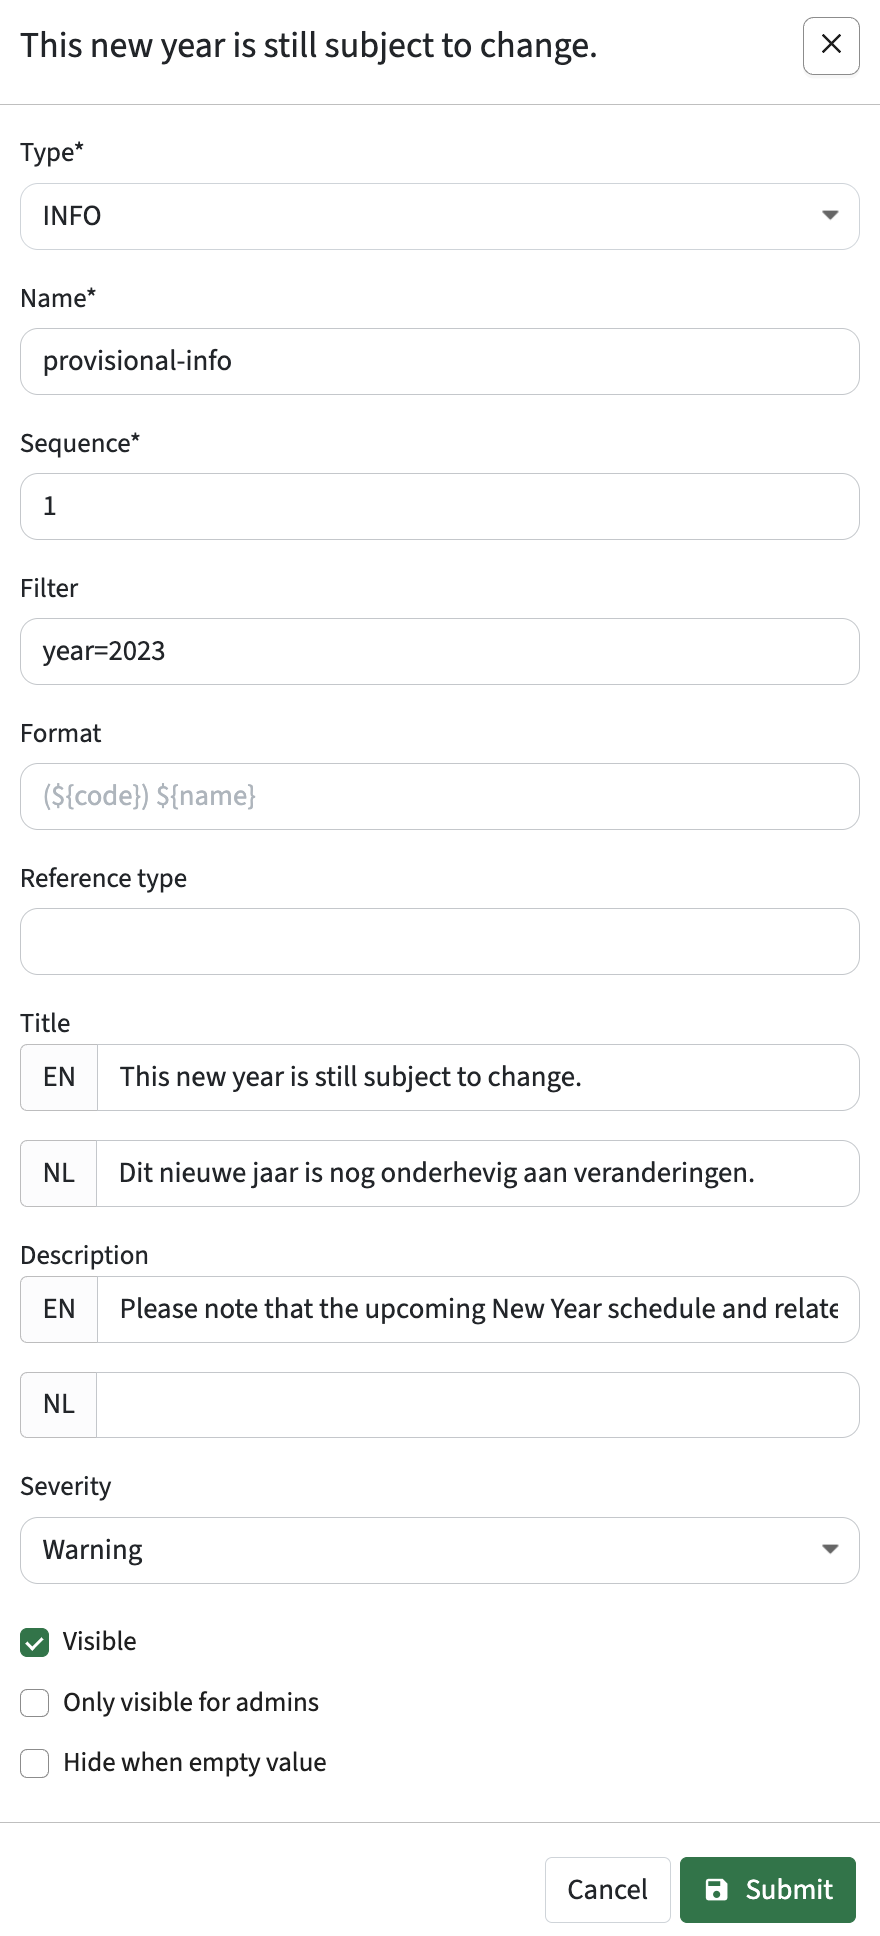

Add a banner information message to be shown in a widget
In this case there is already a defined widget, the general widget. A field of type Info is added to this widget, just like any other field.
In the example the info field is added after the credit field and will only appear if a certain filter value is met.